Browser
Browser
Aktiviteler
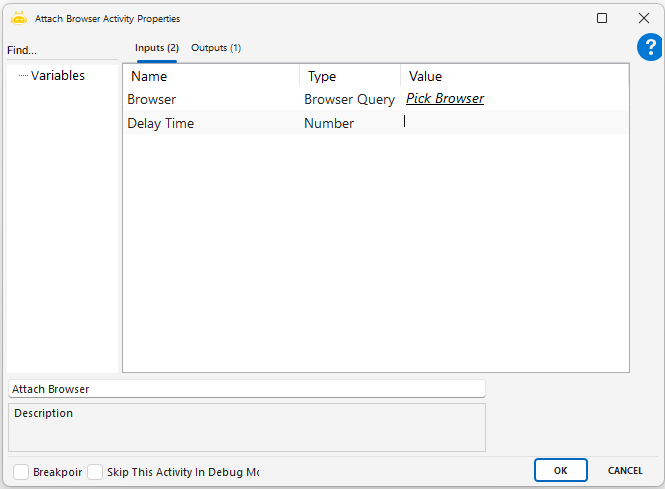
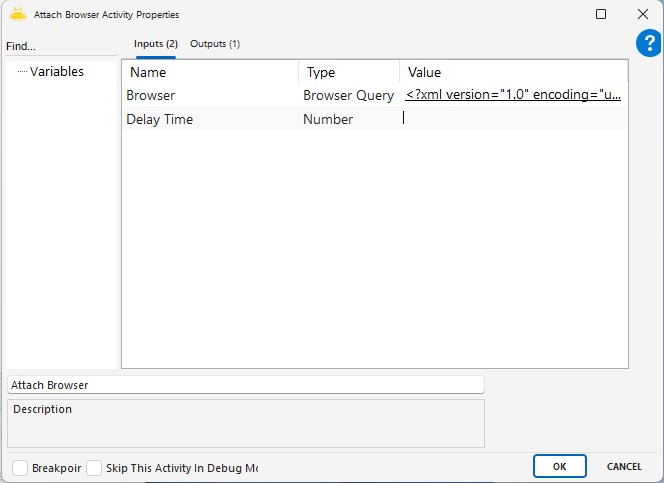
Attach Browser
This activity defines the webpage to be processed in the browser and generates a TabId for it, ensuring that all subsequent operations continue through this identifier. The main purpose of the activity is to guarantee that actions are performed on the correct tab in dynamic web environments.
Usage Steps
Add the Attach Browser activity to the workflow.
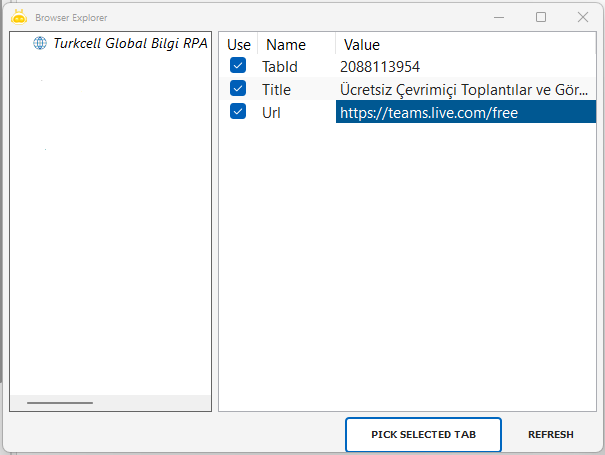
In the Inputs section, click the “Pick Browser” label to start selecting the browser tab.
In the Browser Explorer window that opens, view all currently open tabs.
Select the target tab and click the “Pick Selected Tab” button.
The XML-formatted Browser Query for the selected tab is automatically added.
Optionally, enter a waiting time in seconds in the Delay Time field.
The Attach Browser activity generates a TabId specific to the selected tab.
All following activities operate on this same tab through the generated TabId.
Notes
The selected tab must be open and active; otherwise, TabId cannot be generated.
If multiple tabs have the same title, ensure that the correct one is selected.
If the browser tab closes during processing, subsequent activities may fail.
If the same URL is open in different browser sessions, be cautious during selection.
Clear Value
The Clear Value activity is used to clear the content of input fields (such as input, textarea, etc.) on a web page. It is especially preferred in scenarios where fields need to be reset before filling out forms or when previous data must be removed. This activity completely deletes the value in the targeted field, simulating user interaction.
Parameters:
Tab Id: A unique identifier that binds the activity to the correct browser tab, ensuring the action is performed on the intended tab. This ID is typically obtained from the Attach Browser activity.
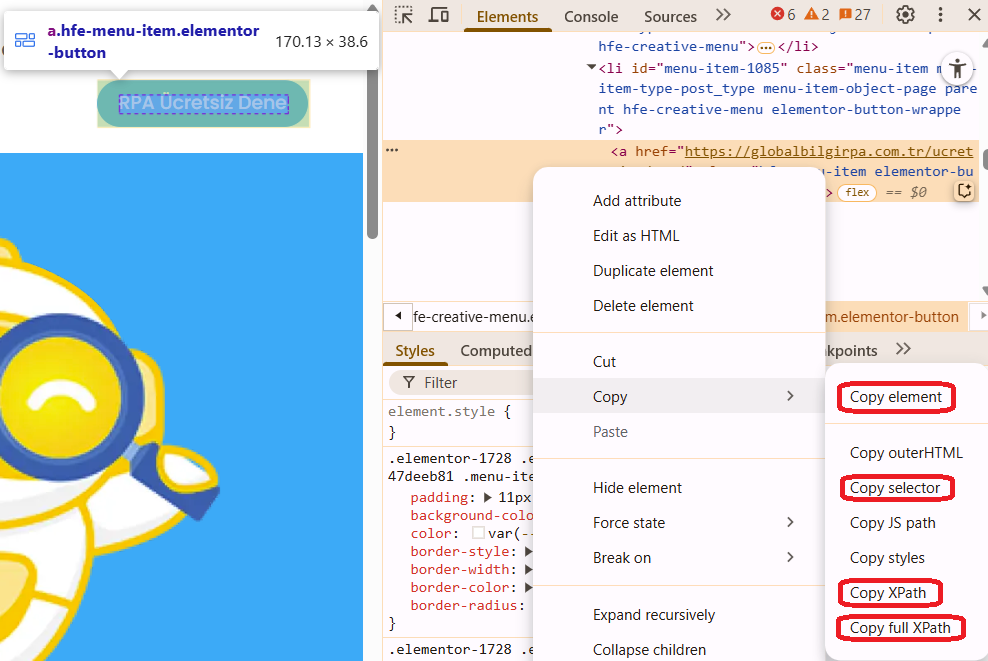
XPath: An XML-based path that indicates the element’s location within the page. Commonly used when the element does not have an id or class attribute. To obtain it, right-click the element, select “Inspect,” then right-click again and choose Copy XPath.
Element Id: The unique id attribute of an HTML element and the fastest identification method. To obtain it, right-click the element, select “Inspect,” and copy the value of the id attribute from the HTML.
Selector (CSS Selector): Identifies the element using a CSS rule and is a short and readable alternative. To obtain it, right-click the element, select “Inspect,” then choose Copy selector.
Implicity Wait: Waits for the element to become visible while the page is loading, specified in seconds. If the page loads slowly or the element appears late, this value can be increased. If left blank, the default is 60 seconds.
Wait For Async Timeout: Waits for elements loaded later via JavaScript or Ajax. Preferred when elements are added to the DOM dynamically.
Notes:
XPath and Selector should not be used together. One is typically sufficient and prevents conflicts.
If the page loads slowly, Implicit Wait should be increased to allow the element to become available.
If the content is dynamic, Wait For Async Timeout should be used to ensure JavaScript/Ajax elements are fully loaded.
Delay Time can be used for animations or late-appearing elements. It helps ensure that pop-ups or overlays have time to close or load before the action is executed
Clear Value By Title
This activity is used to clear the content of an input field on a web page by identifying it through its visible title (label). Instead of using XPath or Selector, it targets the field based on the on–screen title text. This ensures that even if there are multiple similar form fields on the same page, the correct one is selected and cleared using title and ordering information.
Parameters
Title: Specifies the title (label) of the field to be cleared. This is the text displayed on the screen and is used to identify the field.
Title Order: Indicates which occurrence to process if multiple fields have the same title. Counting starts from 0.
Type: Specifies the type of the target element (for example: input, textarea, dropdown). Used to filter element types.
Value: Indicates the existing or default value. Used to target a field that contains a specific value.
Order: If multiple fields match the same criteria, this defines which one will be processed. Counting starts from 0.
Click
The Click activity is used to click on a specific element on a web page. Through this activity, user interaction can be simulated to perform clicks on buttons, links, checkboxes, or any other web element. It is especially useful for initiating actions such as form submissions, opening menus, or switching windows.
Parameters
Tab Id: A unique identifier that binds the activity to a specific browser tab so the click action is performed in the correct tab. This ID is typically obtained from the Attach Browser activity.
XPath: An XML-based path that indicates the position of the element within the page. It is commonly used for elements without id or class attributes. Example usage: //button[@type=’submit’]. It can be obtained by right-clicking the element, selecting “Inspect,” then choosing “Copy > Copy XPath.”
Element Id: The unique HTML id of the element and the fastest identification method. Examples: loginButton, submitForm. It can be taken by right-clicking the element, selecting “Inspect,” and copying the id=”…” value from the HTML.
Selector (CSS Selector): Defines the element using CSS rules and provides a short and readable alternative. Examples: .btn-primary, #loginButton, div.form > button. It can be copied via “Copy > Copy selector” in the browser inspection menu.
Implicity Wait: Used to wait for the element to become visible while the page is loading, specified in seconds. Example: 10. It is used if the page loads slowly or the element appears late; if left empty, the default is 60 seconds.
Wait For Async Timeout: Ensures waiting for elements loaded after the initial page load through JavaScript or Ajax. Example: 15. It is preferred when elements are added to the DOM dynamically.


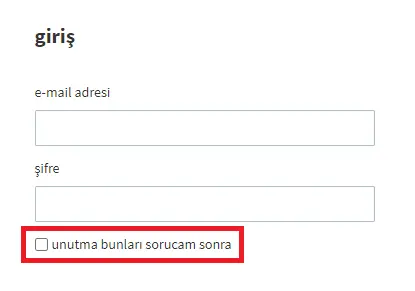
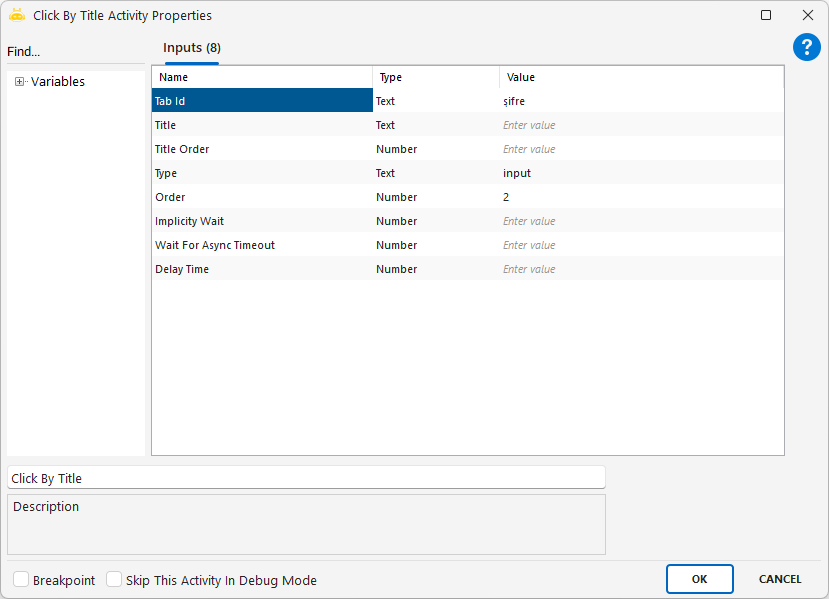
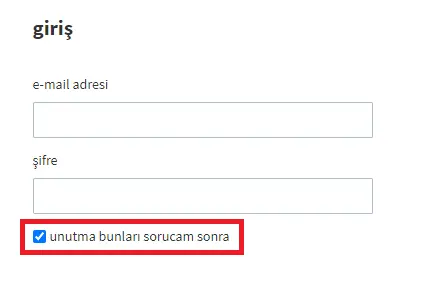
Click By Title
Using the Click By Title activity, you can perform click processing on the object to which the titles on the web page are linked. In the example in the image, the second box under the password title was clicked.
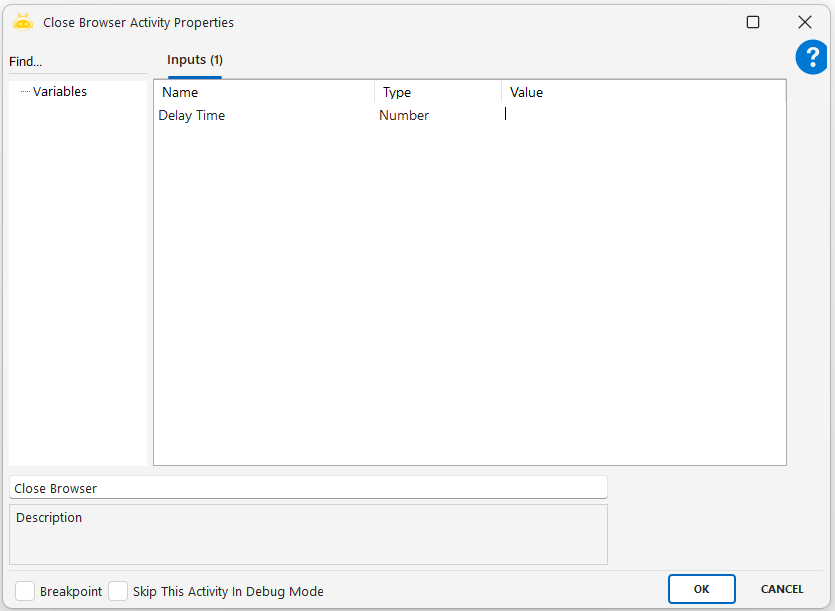
Close Browser
Close Browser activity is used to close a web browser that was opened during an automation process. It is typically placed at the end of browser-based workflows to terminate the session and free up system resources.
Parameters
Delay Time: This parameter is optional. A value in milliseconds can be entered to specify how long the system should wait before the browser is closed.
Usage Examples
Form filling is completed and the browser needs to be closed.
After collecting data from multiple web pages, the session is closed to reduce resource consumption.
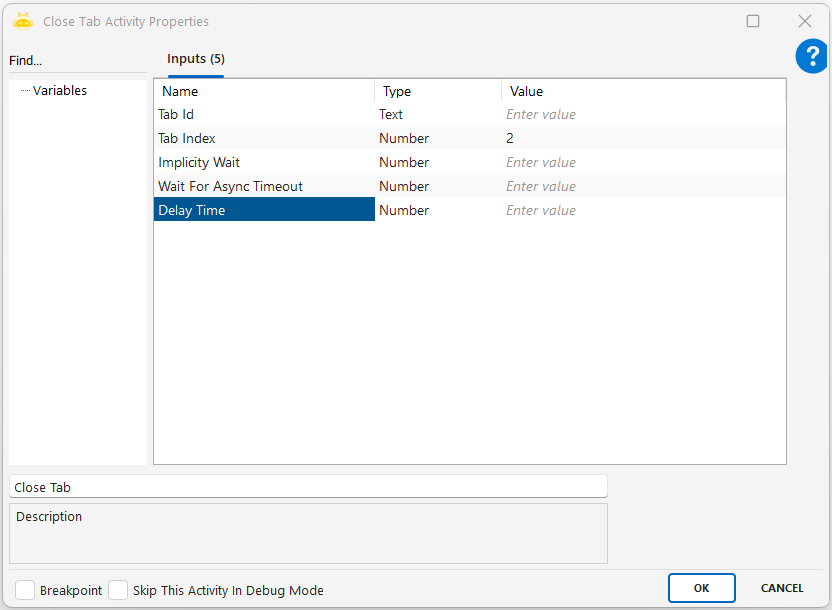
Close Tab
The Close Tab activity is used to close a specific tab in a web browser. It is preferred when only the target tab needs to be closed without shutting down the entire browser. This is particularly useful in multi-tab operations.
Usage Scenarios
Manage multi-tab operations: Used to close tabs sequentially within the same browser.
Close new tabs opened by user actions: Tabs opened through link clicks are closed after the operation.
Isolate and close faulty tabs: Tabs causing errors are closed so the process can continue.
Close the tab at the end of each test scenario: Ensures a clean environment after every test.
User-based session handling: Each user runs in a separate tab and the tab is closed after completion.
Notes
Tab Id and Tab Index should not be used together: Only one should be selected to avoid conflicts.
Tab order may change: Tab Index is not fixed and may vary dynamically.
If background operations are running, they must be awaited: The tab should not be closed before async tasks finish.
Avoid unnecessary waiting time: A high Delay Time slows down automation.
If the browser or tab does not exist, an error may occur: Try-Catch is recommended.
No operation should be performed on a closed tab: Accessing elements after closing the tab will cause errors.
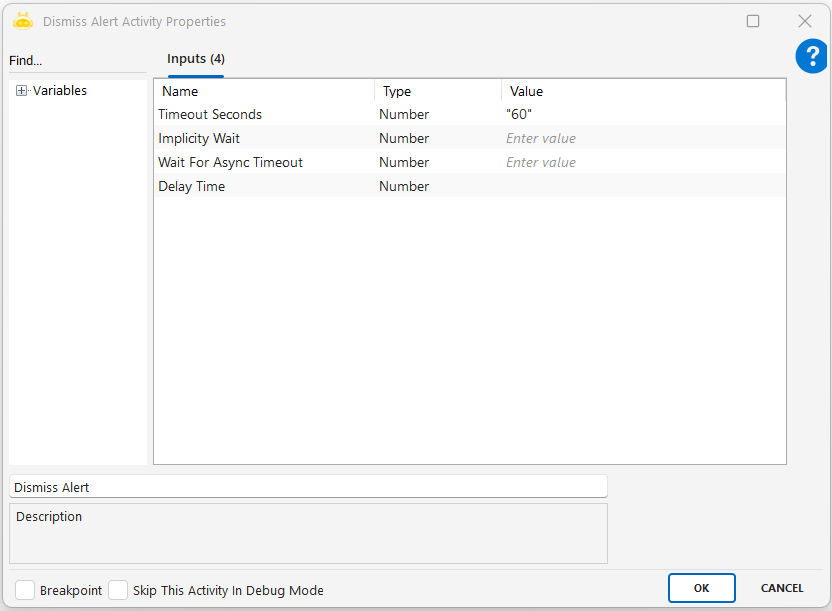
Dismiss Alert
Using the Dismiss Alert activity, if there is a pop-up opened on the browser, you can close it within the specified time.
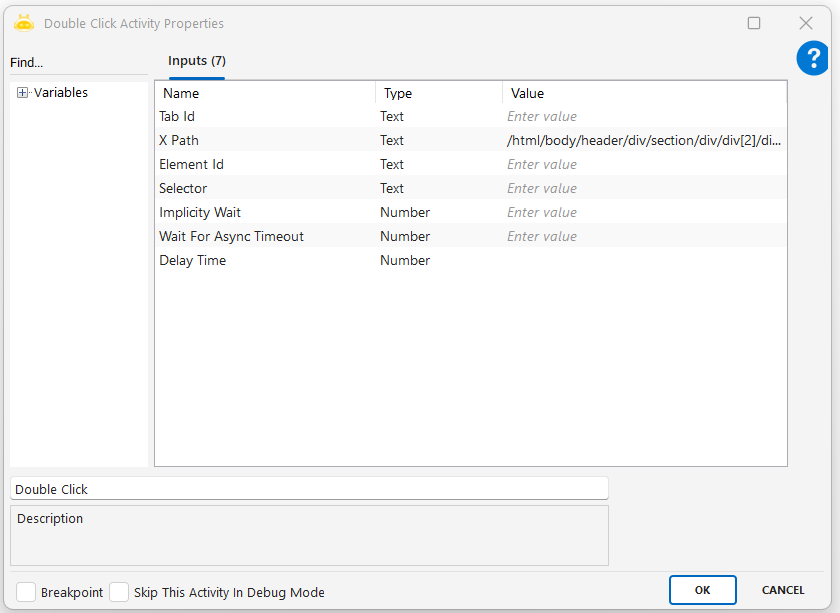
Double Click
This activity is used to perform a double-click action on a specific element of a web page. The element can be targeted using XPath, Element Id, or CSS Selector. It is useful in actions like opening folders, selecting text, or activating input fields.
Parameters
Tab Id: Specifies the browser tab where the action will be performed. Usually obtained from the Attach Browser activity.
XPath: Defines the element’s location on the page using an XML path. Commonly used when the element has no id or class.
Element Id: The unique identifier assigned to the HTML element. Provides the fastest and most direct targeting for double-click.
Selector: Defines the element using a CSS rule. A short and readable alternative.
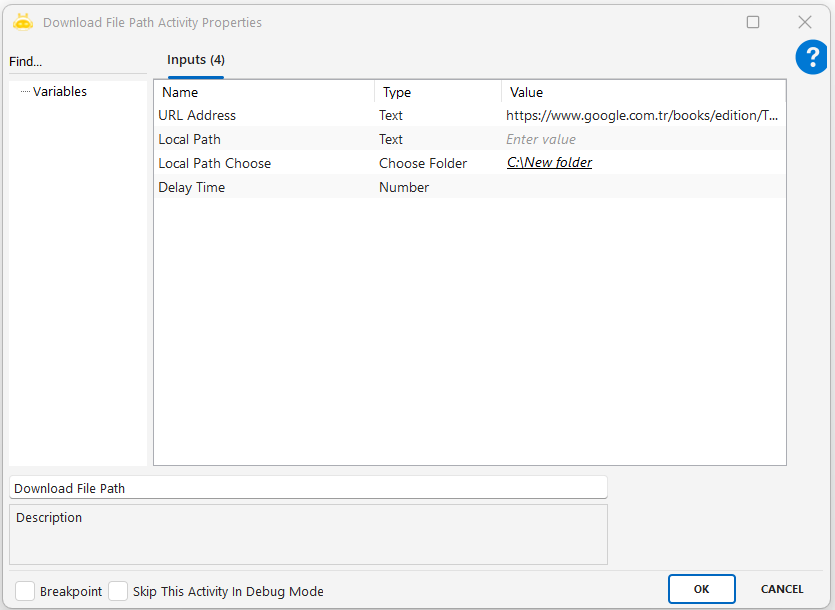
Download File Path
This activity is used to download a file from a given URL address and save it to the specified folder on the local disk.
Usage Scenarios
Web üzerinden erişilen dosyaları otomasyonla yerel diske indirmek.
Dinamik olarak oluşturulmuş bağlantılardan döküman veya rapor çekmek.
Sürekli güncellenen dış kaynaklı dosyaları senaryo içinde kayıt altına almak.
Dosya indirme işlemini manuel işlem yerine otomatik gerçekleştirmek.
Parameters
URL Address: İndirilecek dosyanın web bağlantısı (örn: “https://…”)
Local Path: Dosyanın kaydedileceği tam dosya yolu (örn: “C:\New folder\dosya.pdf”)
Local Path Choose: Kaydedilecek klasör yolu (örn: “C:\New folder”)
Delay Time: İndirme işlemi başlamadan önce beklenecek süre (milisaniye cinsinden)
Notes
URL geçerli ve doğrudan dosya bağlantısı olmalıdır (tarayıcı yönlendirmesi olmamalı).
Local Path girilmezse yalnızca klasör belirterek dosya adı sistem tarafından atanabilir.
Klasör yolu yazma izinlerine sahip olmalıdır, aksi takdirde kayıt başarısız olur.
Aynı isimde bir dosya varsa üzerine yazma riski göz önünde bulundurulmalıdır.
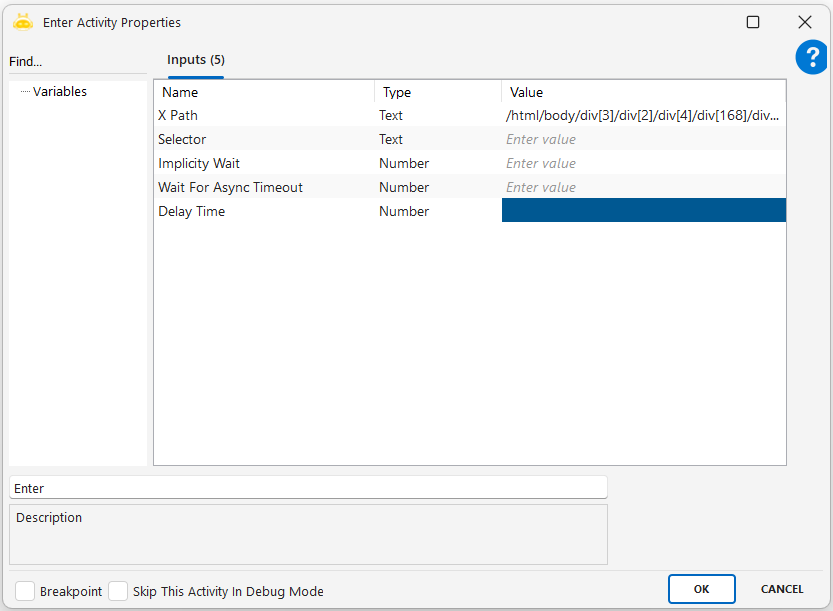
Enter
With the Enter activity, you can trigger the Enter key on a desired object or field on a web page using XPath or Selector.
Usage Scenarios
Submitting a form: After entering user information, the form can be submitted using Enter.
Triggering a search: After typing into a search box, Enter starts the search.
Using Enter instead of a login button: Enter can simulate pressing the login button.
Moving between form fields: Enter can be used to jump to the next form field.
Confirming a modal or popup: Enter can close or confirm a popup window.
Notes
XPath or Selector must be correct to target the intended element.
The element may need to be focused for Enter to work.
Enter should not be pressed before the page finishes loading.
If asynchronous operations occur, a timeout should be defined.
Delay Time should be set appropriately if a wait is needed before pressing Enter.
Focus
Using the Focus activity, you can set focus on a desired object or field on a web page with the help of XPath or selector. It is commonly used for menus that open without a click action.
Usage Scenarios
Activating a menu or area without clicking
Focusing on a field before pressing Enter or typing
Highlighting a specific area visually
Preparing the selected area before keyboard interactions such as tab switching
Triggering dynamic content loading when focus is applied
Notes
XPath or Selector must be defined correctly; otherwise, the focus operation will fail.
The page must be fully loaded before focusing; otherwise, the element may not be ready.
The target element must be visible; hidden elements cannot receive focus.
Follow-up actions after focusing (such as Enter or typing) must be synchronized.
Delay Time may be added to wait briefly after focusing, if needed.


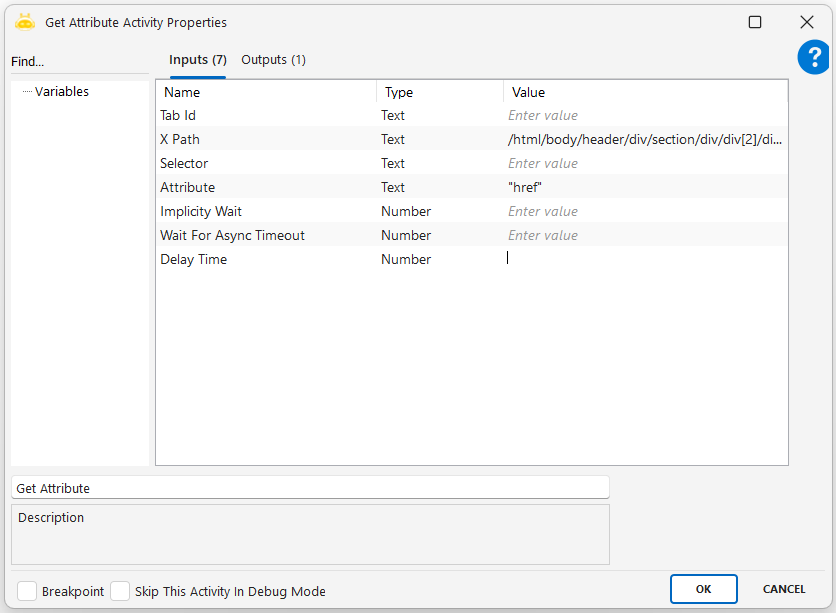
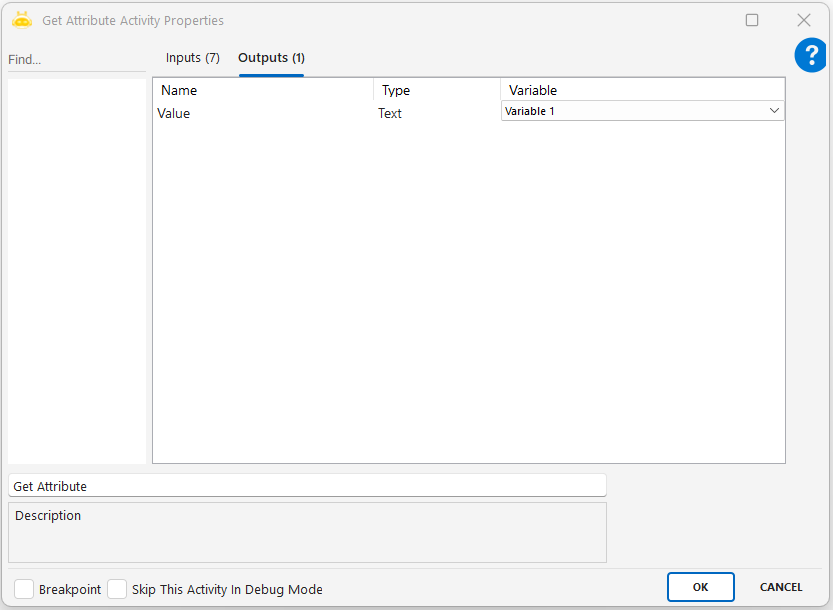
Get Attribute
This activity is used to read a specific HTML attribute from an element on a web page. For example, it can get whether a button is disabled, the destination of a hyperlink, or the content of an input field. The result is returned as a string and typically stored in a variable.
Parameters
Tab Id: The unique identifier that links the activity to the correct browser tab. Usually obtained from the Attach Browser activity.
XPath: The XML-based path that defines the element’s location in the page. Often used for elements without clear id or class values.
Selector: Defines the element using a CSS rule. Short and readable alternative. Examples: .btn-primary, #emailInput.
Attribute: The name of the HTML attribute to be retrieved. Examples: href, value, disabled, placeholder.
Implicity Wait: Wait time in seconds for the element to become visible while the page loads.
Wait For Async Timeout: Wait time for elements loaded dynamically via JavaScript or Ajax.
Delay Time: Time the robot should wait before executing the operation.
Notes
The attribute name must be valid and written correctly. Incorrect or non-existent attributes cannot be retrieved.
XPath and Selector should not be used together; only one should be chosen to avoid conflicts.
Returned data is always treated as text (string), even if it represents numeric or boolean values.
If the page loads slowly, increase Implicit Wait.
For dynamically loaded content, use Wait For Async Timeout to ensure the element is available in the DOM.

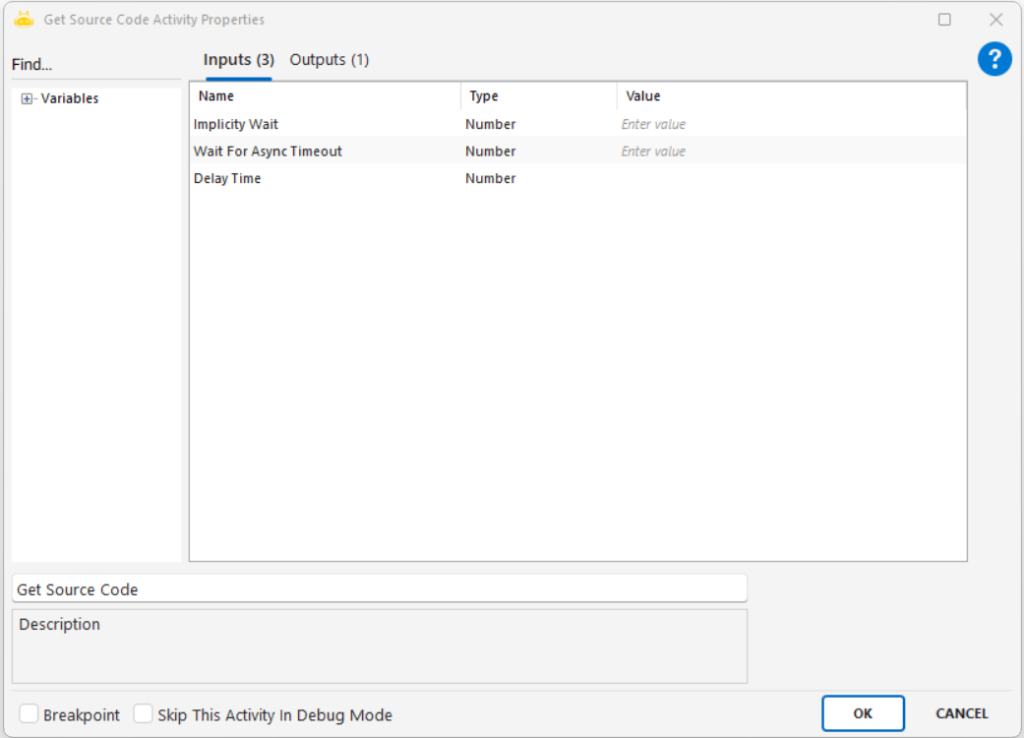
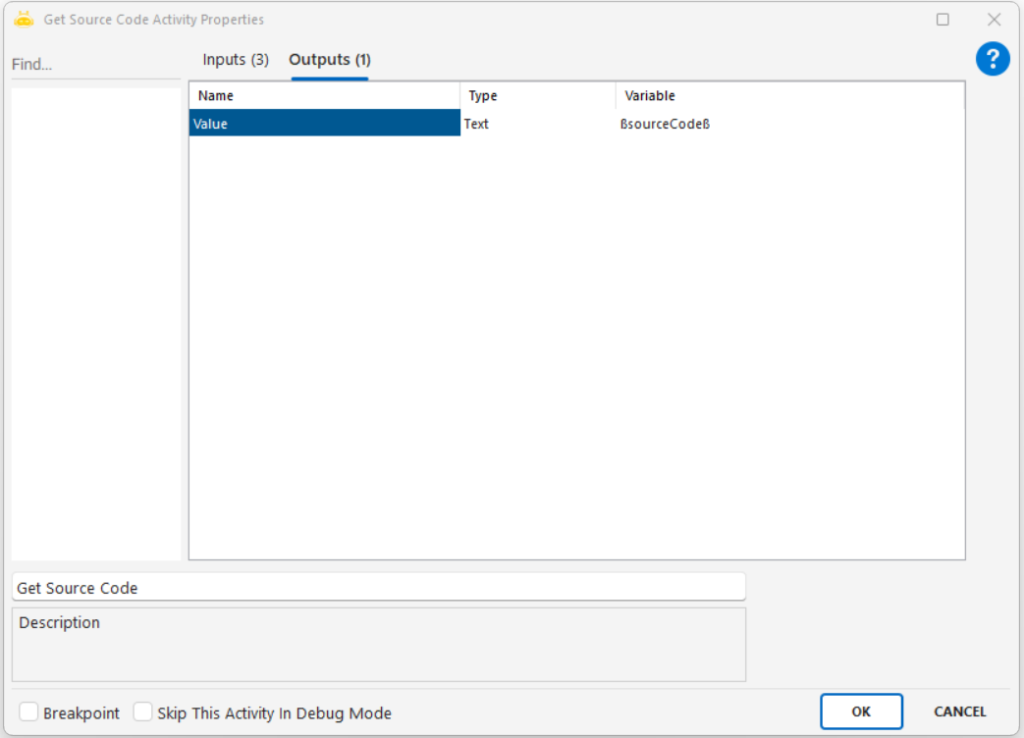
Get Source Code
You can get the source codes of the web page opened with the Open Browser activity by using the Get Source Code activity and transfer them to a variable. There is no mandatory input value.


Get Text
This activity is used to read the visible text located on a specific element on a web page and assign it to a variable. It is ideal for retrieving information such as titles, descriptions, prices, or labels displayed on the page.
Usage Scenarios
Retrieve product price, title, or description
Extract headlines from news sites
Read static texts or system messages in forms
Verify the correctness of values displayed to the user in web interfaces
Capture dynamically updated texts on the page
Parameters
XPath / Element Id / Selector: Used to identify the target element where the text is located.
Examples:
XPath → “//span[@class=’price’]”
Element Id → “product-title”
Selector → CSS selector structure (varies by platform)
Outputs
The variable where the extracted text will be stored. Typically of type Text.
Examples: @Price, @Title
Notes
If the page has not fully loaded, an empty value may be returned.
If the target element is not visible or not present in the DOM, an error may occur.
If the text is generated by JavaScript, the Get Text activity must be triggered at the correct moment.
XPath provides more flexibility for dynamic elements.

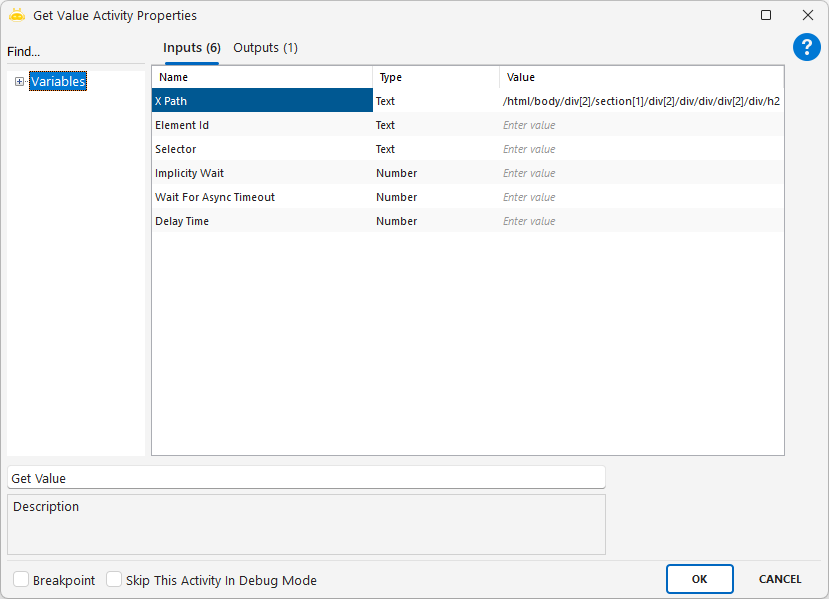
Get Value
The Get Value activity is used to read the value of a specific element on a web page and assign it to a variable. It is typically preferred for retrieving the content of elements such as <input>, <textarea>, or <select>.
By using the Get Value activity, you can transfer a value in the web page to a variable with the help of xpath, element id, or selector.
Usage Scenarios
Retrieve values entered in form fields
Get the value inside a search box
Check auto-filled fields (such as email, username)
Read hidden data fields on the page (such as tokens or hidden inputs)
Parameters
XPath: Used to locate the target element. Example: “//input[@id=’email’]”
Element Id: Identifies the HTML element by its id value. Example: “usernameField”
Selector: Provides access to the element using CSS selector syntax. Example: “input[name=’adres’]”
Outputs
A text-type variable where the retrieved value will be stored.
Example: ßEmailAdresiß
Notes
This activity reads only the value attribute of an HTML element.
For visible text, the Get Text activity should be used instead.
If the page has not fully loaded, an empty value may be returned.
When working with XPath, ensure the element is an input field.
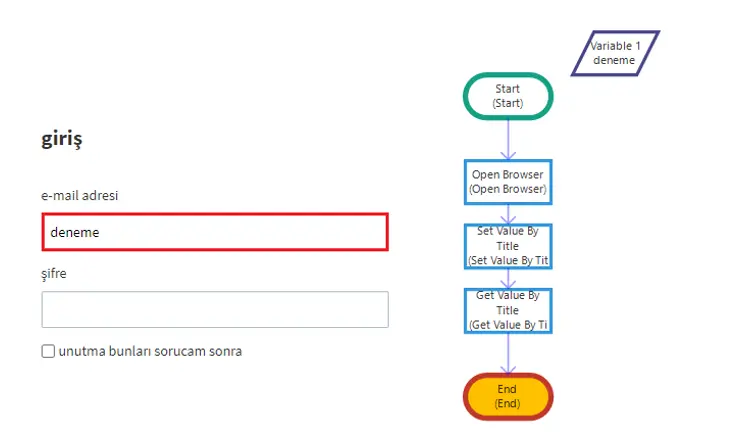
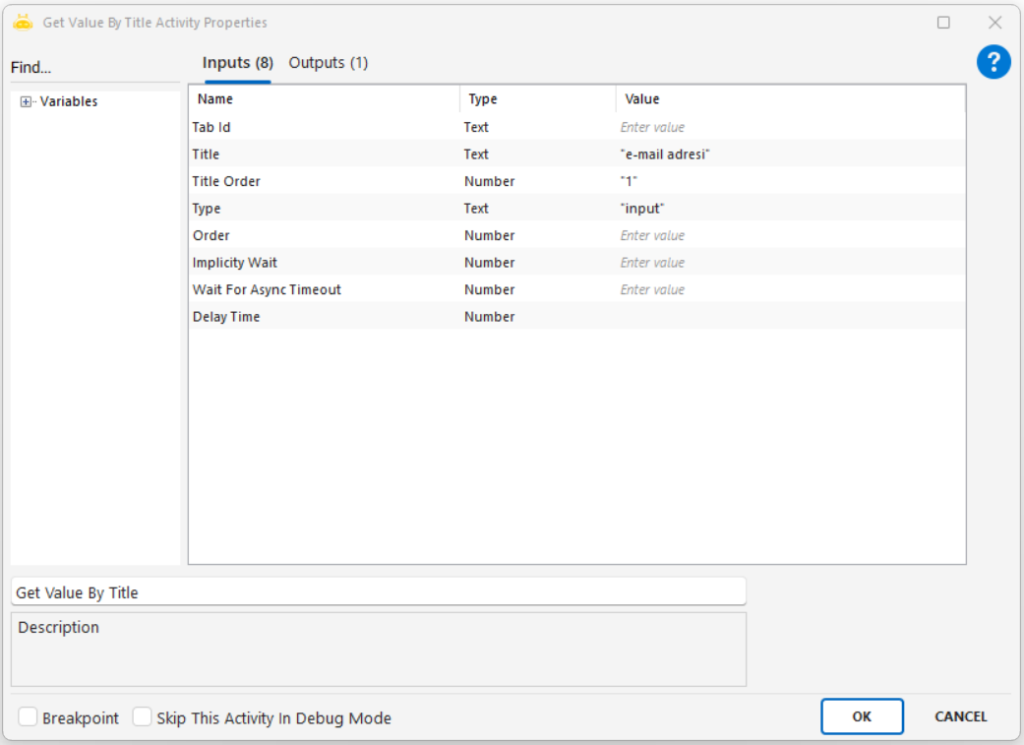
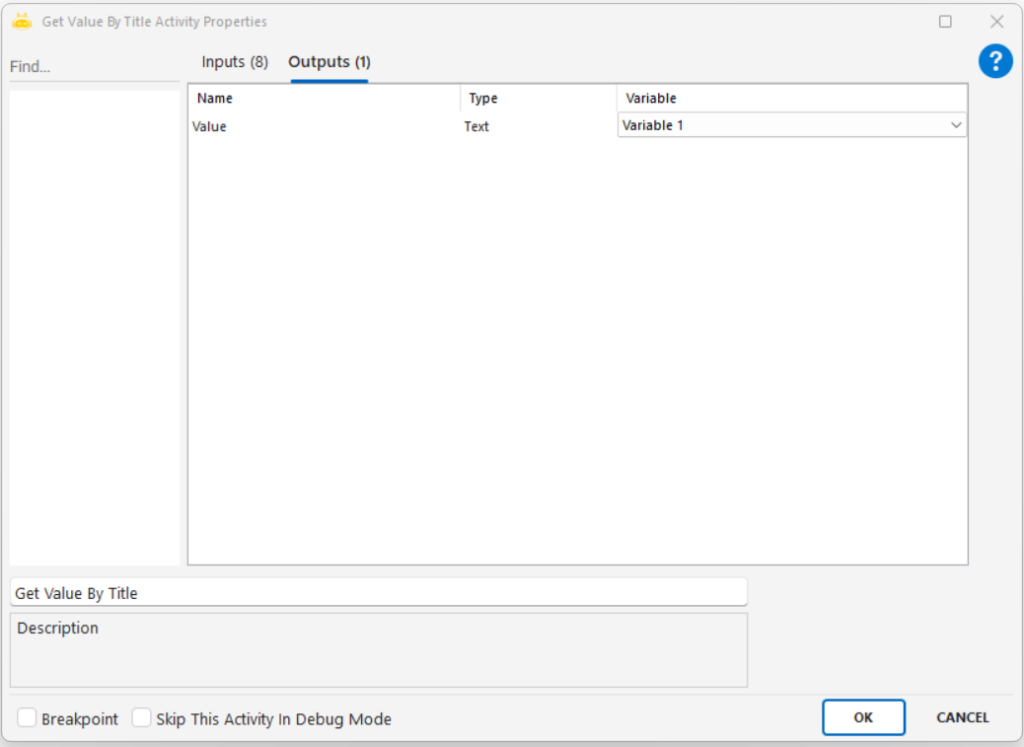
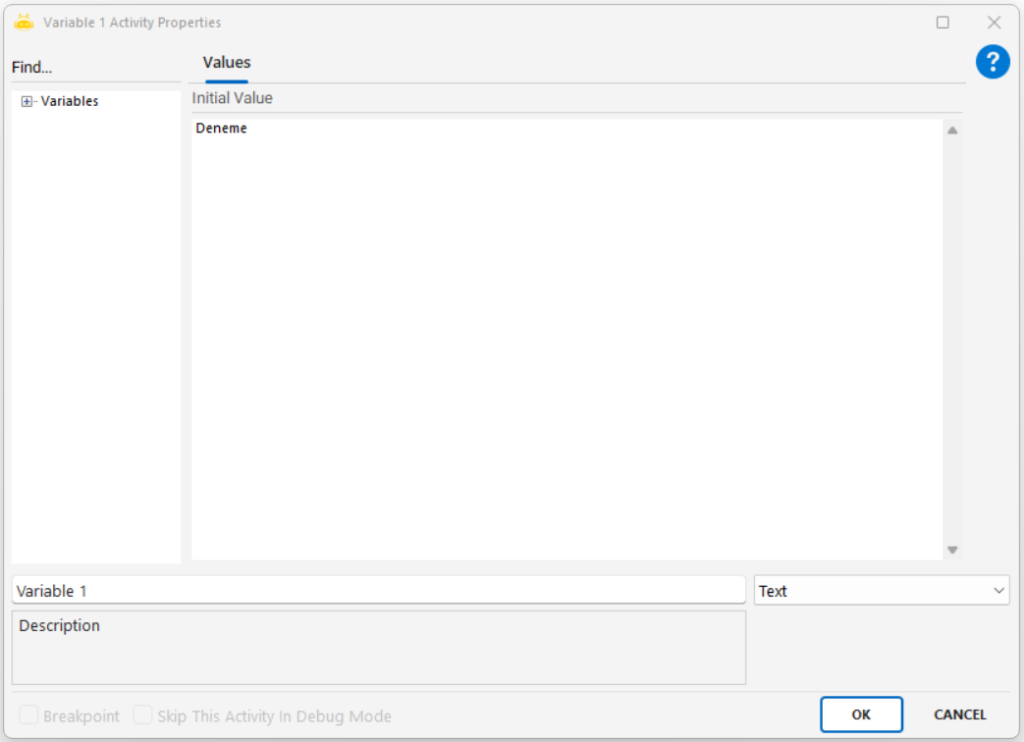
Get Value By Title
The Get Value by Title activity identifies the fields on a web page that are linked to specific titles and retrieves the value inside those fields, then transfers it to a variable. It is especially used to automatically detect the title–input relationship in forms.
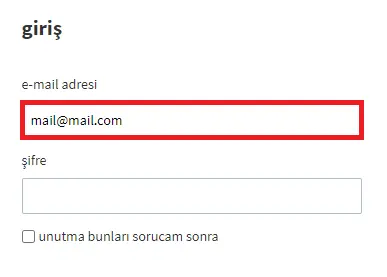
With the Get Value by Title activity, you can determine the fields on the web page to which the titles are linked according to the title, get the data in it, and transfer it to a variable. In the example shown in the image, the field containing the text “test” was identified according to the “e-mail address” title, and the data in it was transferred to the variable.
Usage Scenarios
Reading values such as email, username, or phone number from form fields
Extracting data by identifying fields based on their titles
Retrieving data from dynamic pages using fixed titles
Performing position-independent operations in title-associated inputs
Parameters
Tab Id: The value provided by the Attach Browser activity that specifies the tab where the operation will take place.
Title: The title text to which the target field is linked. Example: “e-mail address”
Title Order: Specifies which instance to use if the same title appears multiple times on the page. Example: 1 → the first match
Type: The type of the field. Typically used as “input”.
Order (optional): Can be used if there are multiple fields of the same type.
Implicitly Wait: Maximum waiting time (in seconds) for the page to locate the relevant element.
Wait For Async Timeout: Waiting time (in seconds) for dynamic content on the page.
Notes
The relationship between the title and the field must be correctly matched visually or structurally.
If the page loads dynamically, timing should be adjusted using parameters such as Delay Time or Implicitly Wait.
The title text must match exactly; additional spaces or punctuation may cause errors.
Example Scenario Explanation
Title: “e-mail address”
The input field linked to this title contains the value “deneme”.
When the Get Value by Title activity is executed, the value “deneme” is retrieved and assigned to the variable named Variable1.
Go Back
On the web page opened with the Open Browser activity, you can use the Go Back activity to return to the previous page. There is no mandatory input value.

Go Forward
In the web page opened with the Open Browser activity, you can use the Go Forward activity to go to the next page. There is no mandatory input value.
Is Displayed?
With the Is Displayed activity, you can check whether an element on the web page is visible using xpath, id, or selector.
Usage Scenarios
Checking whether a warning message is visible: Used to verify if an error or information message appears on the screen.
Detecting whether loading is complete: If an element becomes visible, the process is assumed to be completed.
Checking whether a row exists: If there is no data on the page, the workflow can proceed to a different scenario.
Directing the flow based on dynamic fields: If a specific field becomes visible, related actions can be triggered.
Understanding whether a modal or popup is open: If a popup exists, the process may need to wait or close it.
Notes
XPath, id, or selector must be defined correctly; if incorrect, the element cannot be found and returns false.
Timeout Seconds must be set properly; if too short, the element may return false before it loads.
The page should not be checked before it fully loads; otherwise, an existing but not-yet-visible element may be interpreted as false.
Hidden elements are not considered visible; elements hidden with CSS will return false.
The correct tab or window must be checked; if Tab Id is not provided, visibility may be evaluated in the wrong context.

Navigate
If you want to open a different web page on a browser opened with the Open Browser activity, you can use the Navigate activity.
Usage Scenarios
Switching to another page after logging in: After login, the user can be redirected to a dashboard.
Navigating from the main page to a subpage: Access can be provided directly via URL instead of using the menu.
Opening pages with dynamic parameters: Pages containing IDs or query parameters can be called.
Changing the page in the same tab: Loads different content in the same browser tab without opening a new one.
Accessing pages using cookies, username, and password: Used for pages requiring authentication.
Notes
The Address field must contain a valid URL; an incorrect or empty address will cause an error.
Tab Id must be defined correctly; otherwise, the action may run in the wrong tab.
Delay Time should not be unnecessarily long; otherwise, the process slows down.
Cookies must be entered in a proper format; invalid cookies may prevent the page from loading.
Username and Password should only be entered when needed; they should be left empty for pages that do not require login.

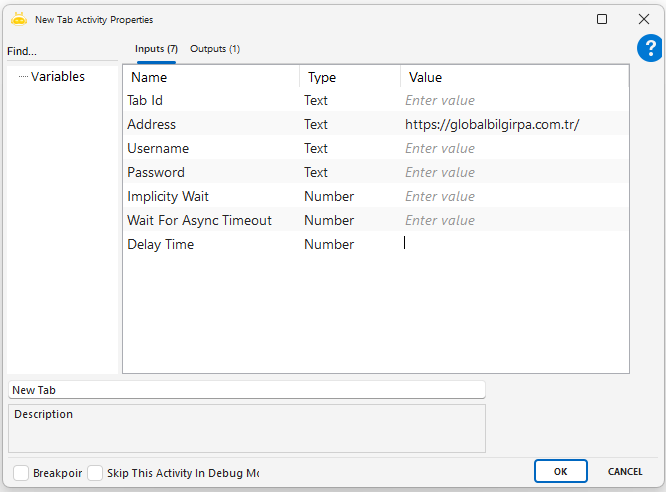
New Tab
If you want to open a different web page in a new tab, other than the web page opened with the Open Browser activity, you can use the New Tab activity.
Usage Scenarios
Opening a new tab for different operations: Multiple pages can be managed in parallel within the same session.
Accessing different screens with the same user: The session information is preserved while opening a new page.
Displaying search results in a separate tab: Operations can be performed without losing the main screen.
Opening reports, documents, or external links in a new tab: New content loads without closing the main page.
Separating control screens after login: Tab-based management becomes easier for permission screens.
Notes
The address must be a valid URL; if entered incorrectly or left empty, the tab will not open.
Tab Id must be assigned correctly if a tab-specific operation will be performed.
Delay Time should not be unnecessarily long; excessive waiting slows down the automation.
Username/Password should be left empty unless required; not every page needs authentication.
Session conflicts may occur on cookie-based pages; session handling should be checked in multi-tab environments.

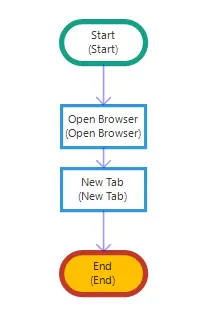
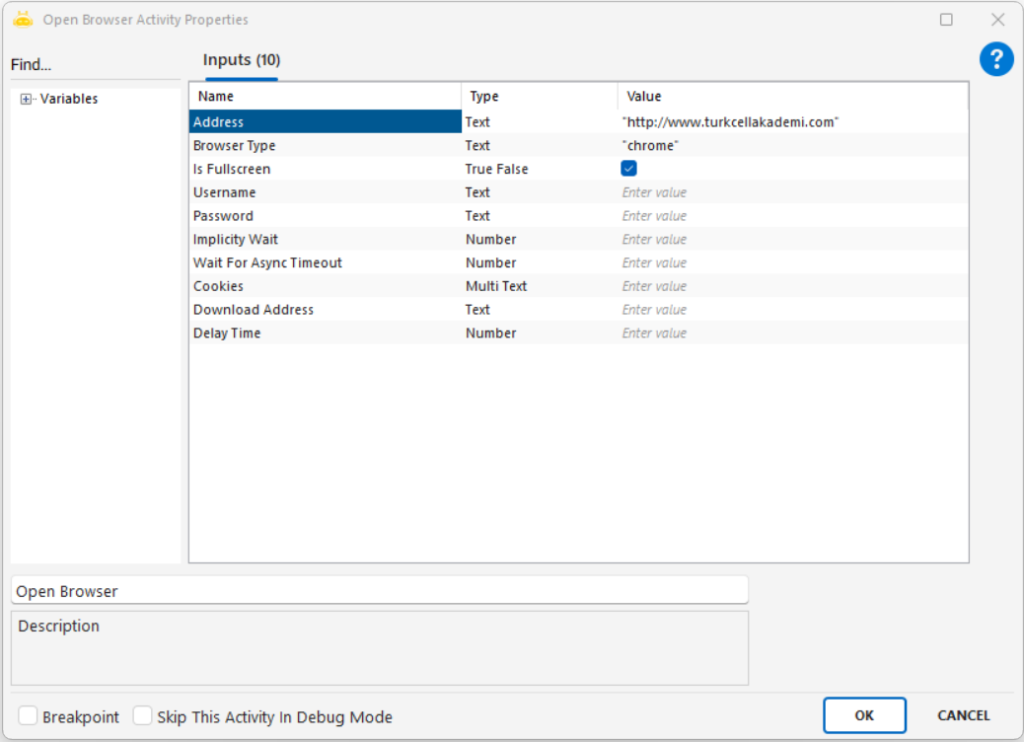
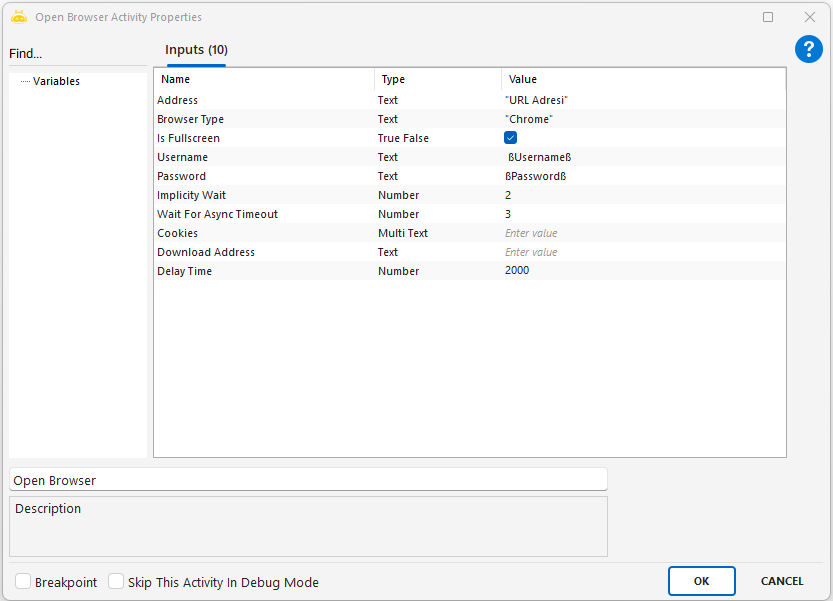
Open Browser
With the Open Browser activity, you can open the web page you want through the browser, and you can perform actions using the Browser activities. We write the URL address in the Address line of the activity and the browser type (chrome or edge) in the Browser Type line. If you want the web page to open in full screen, it is sufficient to set the Is Fullscreen value to “True”.
Usage Scenarios
Opening a web-based application
Starting operations such as form filling, data extraction, or button clicking
Initiating browser-based test and automation processes
Accessing login screens
Parameters
Address: The full URL of the web page to be opened. Example: “http://www.turkcellakademi.com/“
Browser Type: The browser type to be used. Must be written as “chrome” or “msedge”. Example: “chrome”
Is Fullscreen: Determines whether the browser will open in full-screen mode.
True → Opens in full screen
False → Opens in normal window modeUsername: If the page supports authentication, the username can be written here (optional).
Password: The password belonging to the user; must be used together with Username.
Implicity Wait: Maximum wait time (in seconds) before accessing page elements. Used as a general page-load wait.
Wait For Async Timeout: Additional wait time (in seconds) for JavaScript or dynamic content loading.
Cookies: Cookie information to be sent to the web page. Must be entered in a formatted structure.
Notes
Browser Type must be written correctly as “chrome” or “msedge”.
Address must include the protocol (http:// or https://).
If actions will be performed after opening the page, time parameters such as Delay Time or Implicity Wait should be set.
If Is Fullscreen is enabled, the page launches in full-screen mode, which may be more suitable for visual automation.

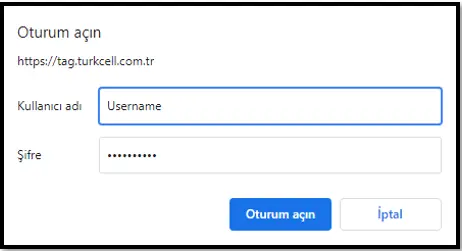
If the website you want to open asks for user and password information as a pop-up, you can use the Username and Password lines.
You can add Cookies to the browser opened by the robot by using the Cookies feature of the activity. In this way, you can pass with Cookies information without filling in the username and password fields on a logged-in web page.

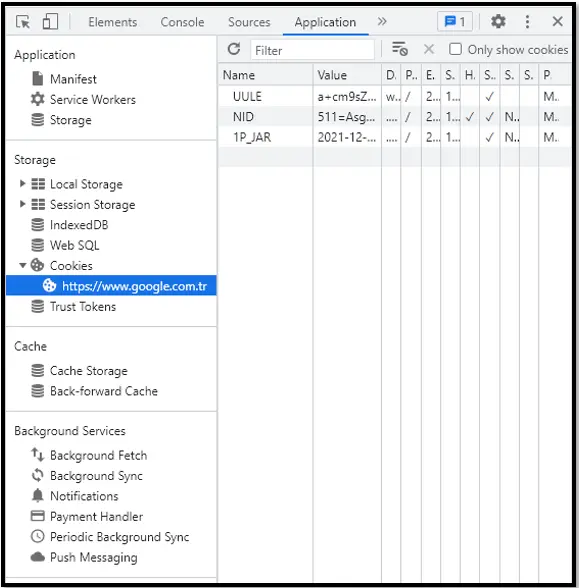
To access cookies information, you can follow the steps Inspect (F12 or CTRL+SHIFT+I) > Application Tab > Cookies. When filling in the Cookies line, there must be a comma between Name and Value.
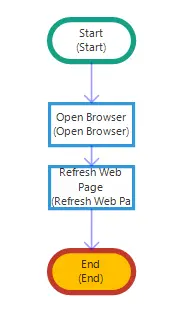
Refresh Web Page
The Refresh Web Page activity is used to refresh a web page that is open in the browser. It ensures that the page content is updated. It does not contain any mandatory parameters, meaning it performs its function simply by being added and executed. It is commonly preferred in cases where the page does not refresh automatically or has loaded incorrectly.
Usage Scenarios
Updating content when the page does not refresh automatically
Reloading the page when it appears blank or loads incorrectly
Keeping live data up to date by refreshing at specific intervals
Returning the page to its initial state after a form submission
Ensuring the latest system-generated data is displayed instead of outdated page content
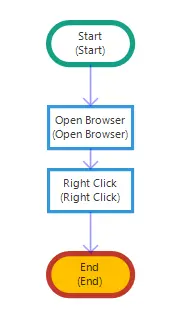
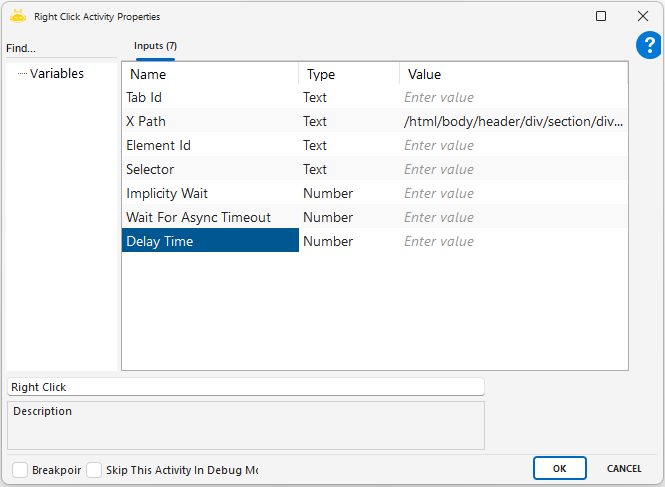
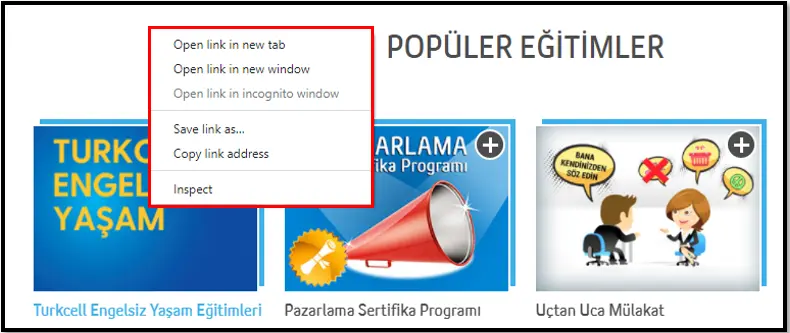
Right Click
Using the Right Click activity on a web page opened with the Open Browser activity, you can right-click on a desired area with the help of XPath, Element Id, or Selector.
Usage Scenarios
Opening a context menu with options such as copy, paste, or delete
Simulating right-click behavior in test scenarios to verify custom menus
Waiting briefly after the menu opens to ensure it is fully displayed before the next action
Notes
XPath, ID, or Selector must be defined correctly, and the target element must be visible
The action should not be triggered before the page is fully loaded
Some websites may block right-click actions; browser differences and similar elements should be tested carefully
Run Java Script
This activity is used to execute JavaScript commands directly on a web page. It is especially useful for interacting with elements that cannot be clicked through standard methods, elements that are not directly accessible, or dynamically loaded components. It can also be used to retrieve information from any HTML element on the page.
Parameters
Tab Id: Identifies the browser tab where the JavaScript will be executed. This value is obtained from the Attach Browser activity.
Value: The field where the JavaScript code to be executed is written. Any action or query to be performed on the page must be defined here.
Examples
Click operation
Value: document.querySelector(“#header > div.wrap > ul.nav-actions > li > a > img”).click()
Get attribute (href)
Value: return document.querySelector(“body > header > div.container > div > nav > a:nth-child(2)”).href
Get text (innerText)
Value: return document.querySelector(“body > header > div.container > div > div.o-header__right > div.m-dropdown.js-quick-nav > label”).innerText
Notes
If the JavaScript output needs to be captured, the code must start with return.
Actions such as click can be executed directly via JavaScript.
Wait For Async Timeout is important for dynamic pages, especially when elements load slowly.
JavaScript code must follow valid syntax. Any incorrect spacing, punctuation, or selector structure may cause the activity to fail.

Example: To get the text ‘Invoice and Package/TL’ from the ‘Turkcell’ homepage using the innerText method:
document.querySelector(“body > header > div.container > div > div.o-header__right > div.m-dropdown.js-quick-nav > label”).innerText
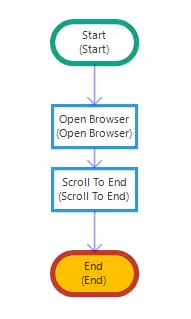
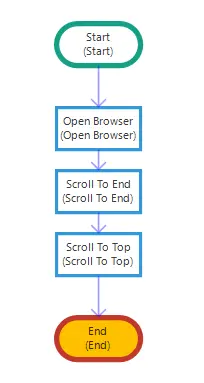
Scroll To End
You can use the Scroll To End activity to go to the end of the web page you have opened. There is no mandatory input value. If you want to do this using Run Java Script activity, you can use the sample Run Java Script code.
Sample Java Script Code: window.scrollTo(0, 5000);

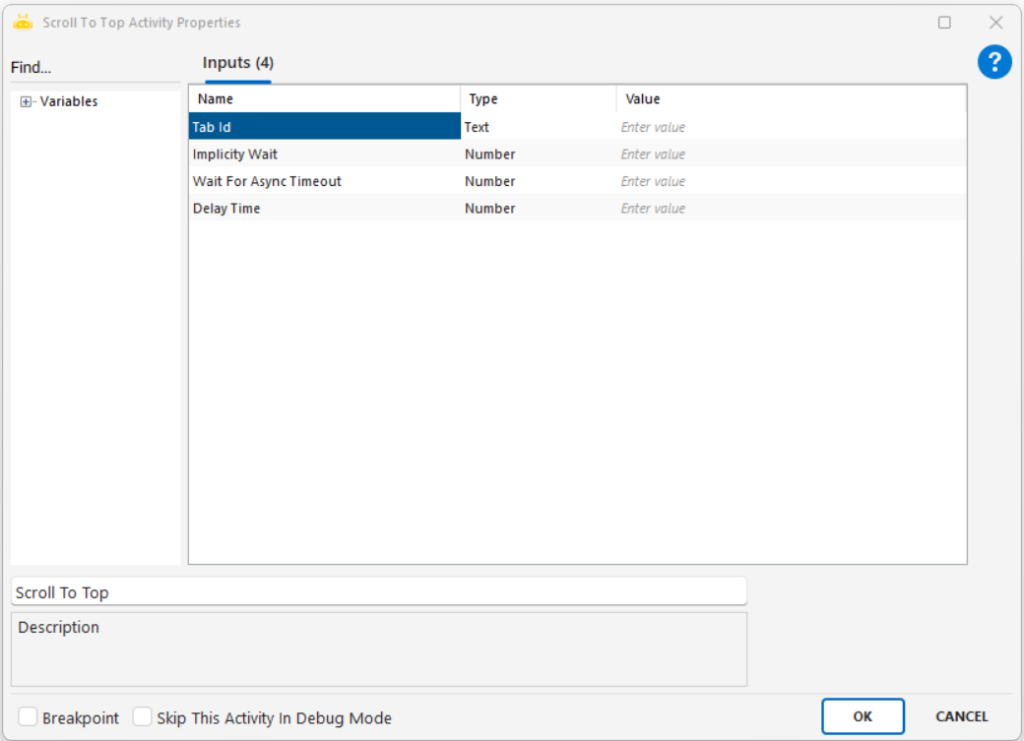
Scroll To Top
You can use the Scroll To Top activity to go to the beginning of the web page you have opened. There is no mandatory input value. If you want to do this using Run Java Script activity, you can use the sample Run Java Script code.
Sample Java Script Code: window.scrollTo(0, 0);
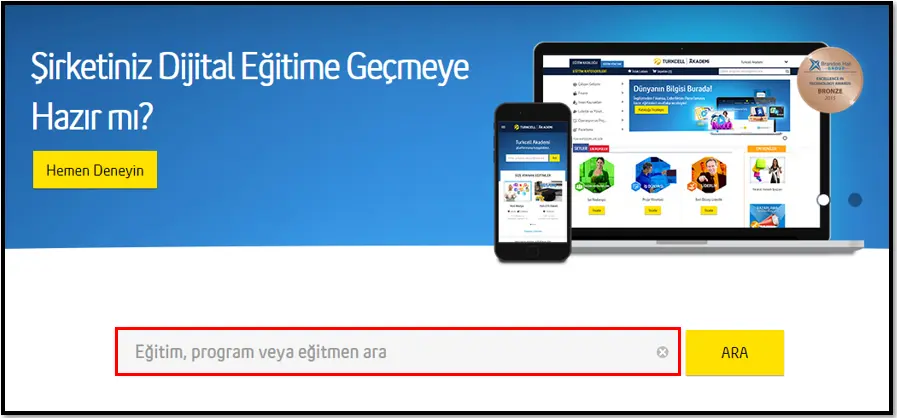
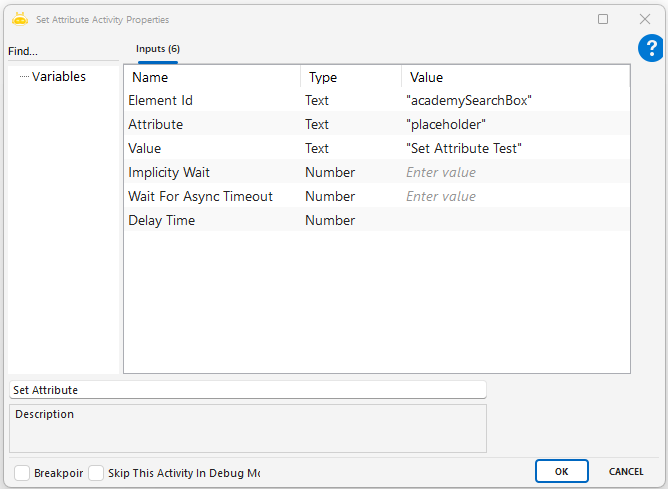
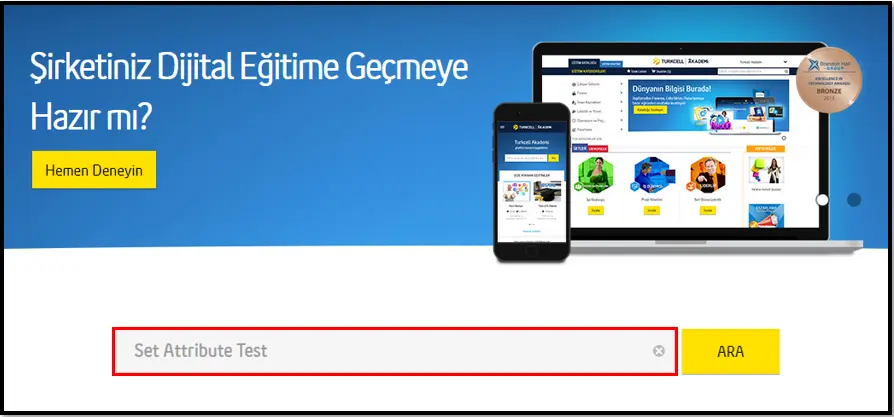
Set Attribute
This activity is used to change the attribute value of a specific element on a web page.
Usage Scenarios
Dynamically updating the placeholder text of a search box
Changing properties such as src, href, value of images, links, or form elements
Adding or removing states of certain elements (for example disabled)
Parameters
Element Id: the ID information of the element on the page where the operation will be performed
Attribute: the name of the attribute whose value will be changed (example: placeholder)
Value: the new value to be assigned to the attribute
Implicity Wait: the maximum waiting time defined while the page element is loading
Wait For Async Timeout: the waiting time for dynamically loaded content via JavaScript on the page
Notes
XPath or selector is not used; it only works with ID.
The attribute name must be valid; if the attribute does not exist on the page, the operation has no effect.
If the page is not fully loaded, the attribute may not change.
The change may not be visible in areas that do not support JavaScript.
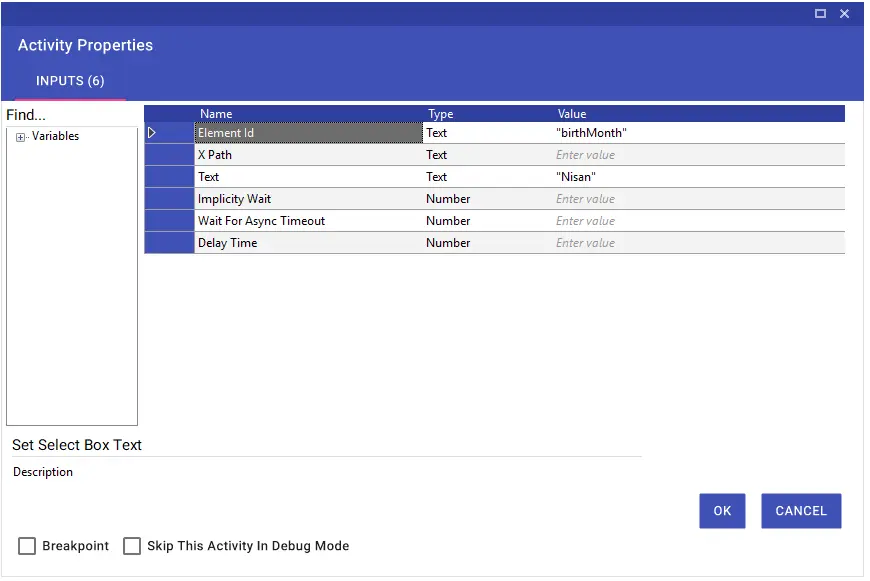
Set Select Box Text
Set Select Box Text activity enables the values in the selection window on the web page to be selected in terms of “Text” with the help of Element Id or Xpath.

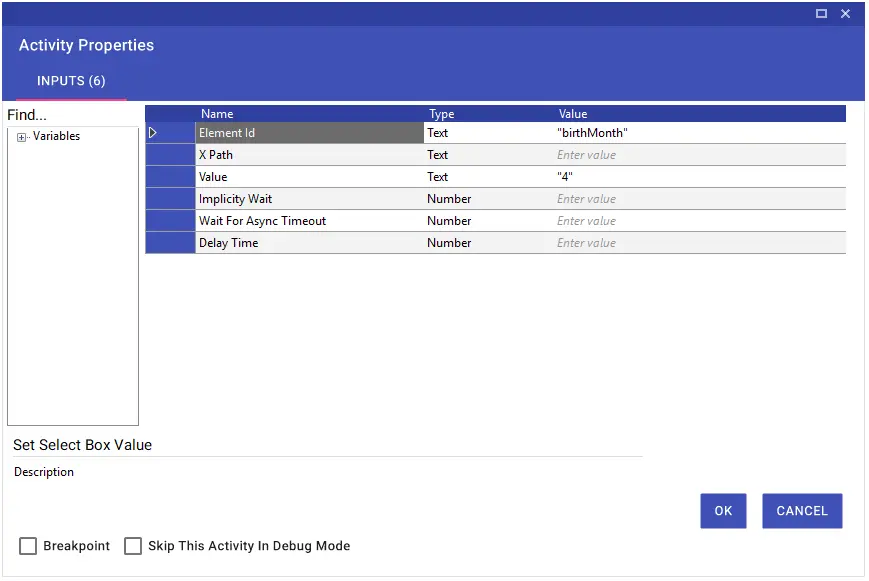
Set Select Box Value
The Set Select Box Value activity enables the values in the selection window on the web page to be selected in terms of “Value” with the help of Element Id or Xpath.

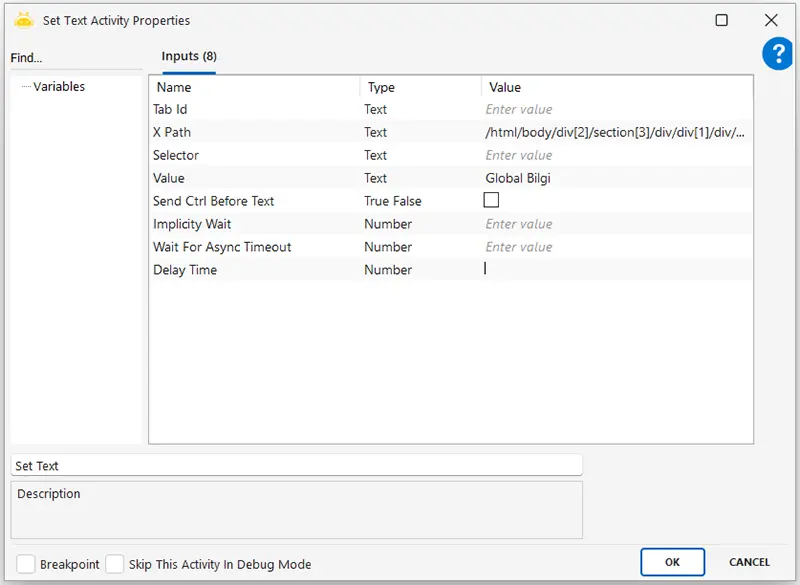
Set Text
Using the Set Text activity, you can target a specific field on a web page using XPath or a selector and input data. Additionally, to paste data copied to the clipboard, you can enter “v” in the Value field and set the Send Ctrl Before Text option to “True”. This will use the CTRL + V command to paste the data into the targeted field.

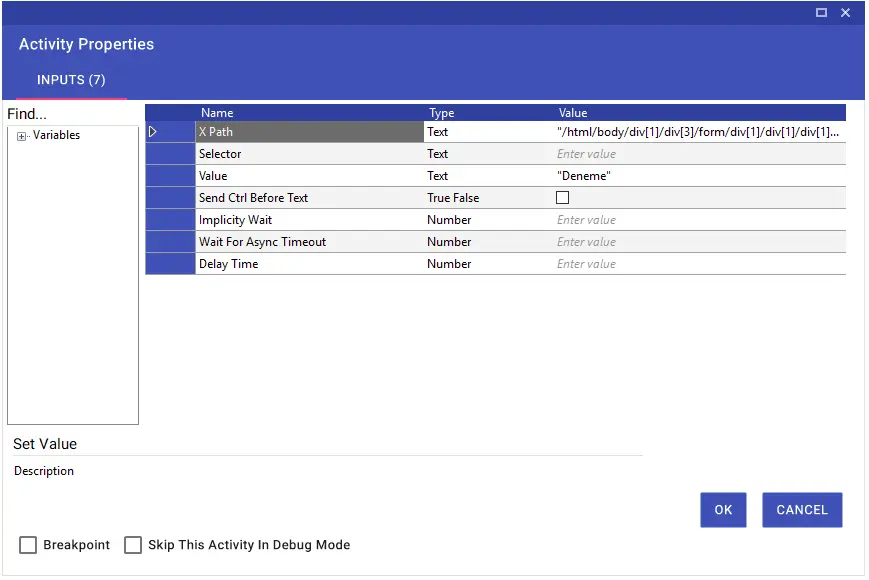
Set Value
By using the Set Value activity, you can enter data to a selected area on the web page with the help of xpath or selector. In addition, you can copy the data you copied to the clipboard by typing “v” in the Value line, selecting the Send Crtl Before Text line as “True” and pasting it with the CTRL + V command in the relevant field.


Set Value By Title
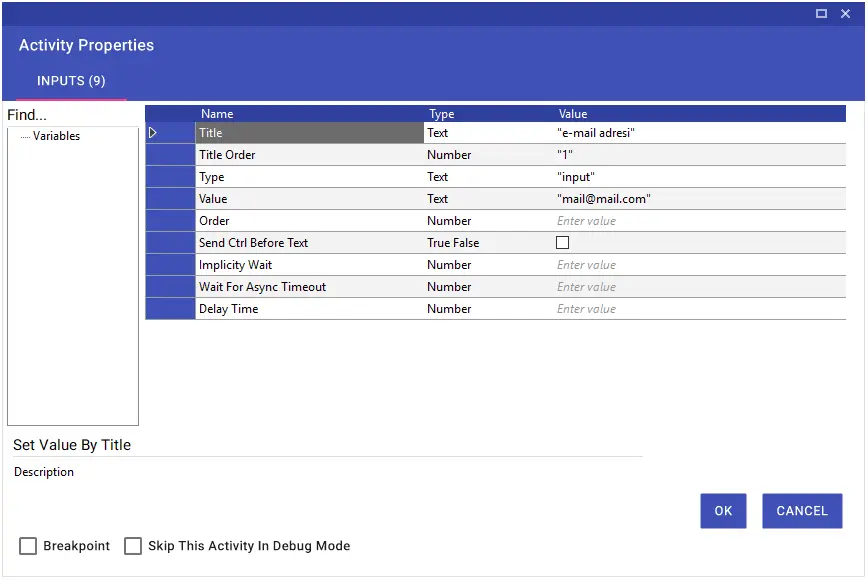
With the Set Value By Title activity, you can enter data into the related fields of the titles on the web page. In the example in the image, the sample e-mail address is printed in the field to which the “e-mail address” heading is linked on the registration page.
Spesific Key
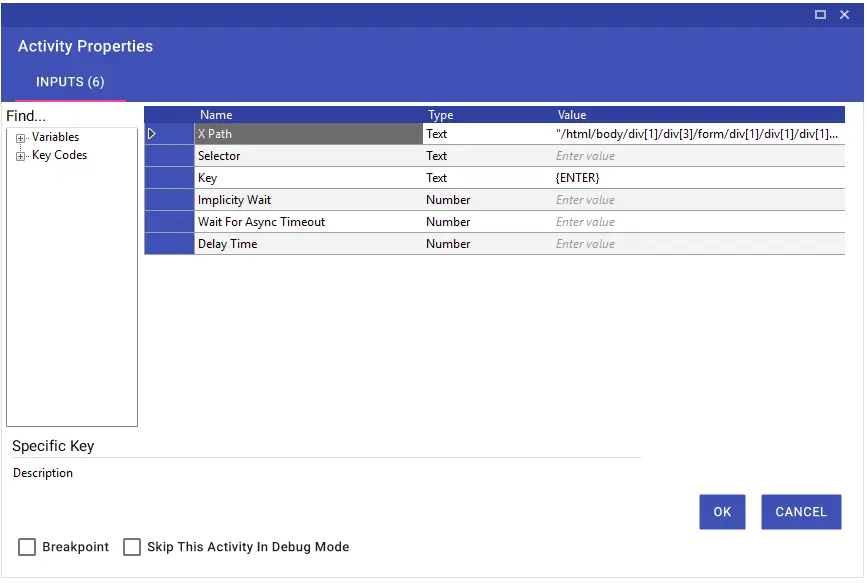
The Specific Key activity is used to operate on the browser with keyboard keys. The values to be entered in the “Key” line of the activity are provided in the table below. You can enter the shortcut keys manually in the text line or by drag and drop using the “Key Codes” window on the left.
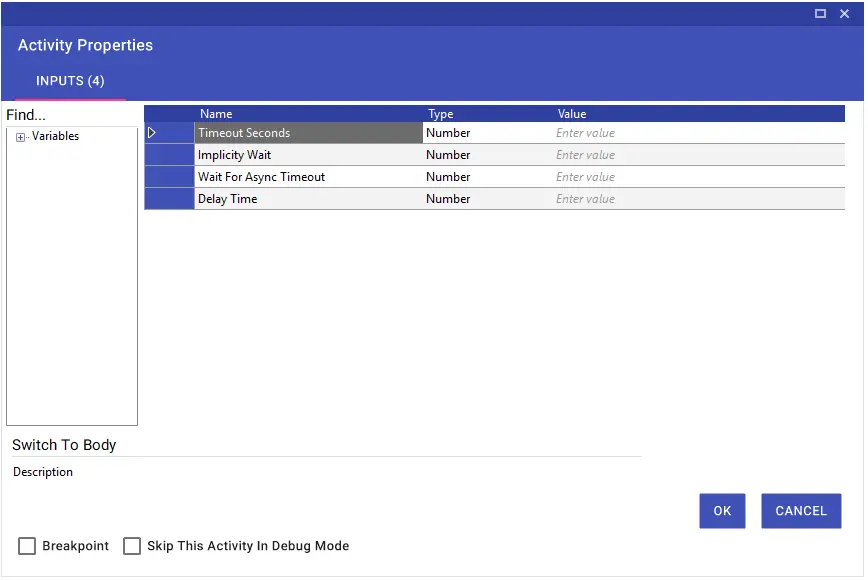
Switch To Body
The Switch to Body activity is used to exit the iFrame and return to the home screen. There is no mandatory input value.
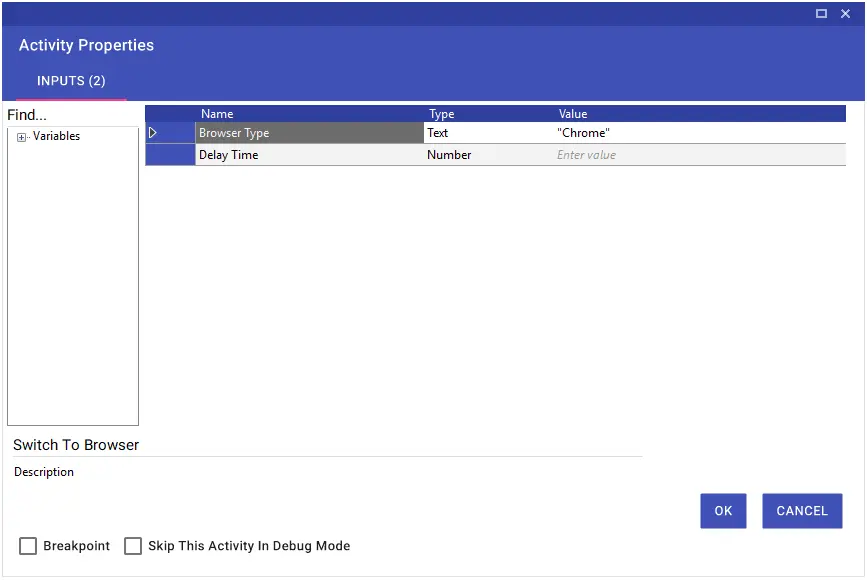
Switch To Browser
Using the Switch To Browser activity, you can switch between browsers. For example, if you are going to switch to the Chrome browser while working with Explorer and the flow will continue through Chrome, “Chrome” must be written in the Browser Type line.
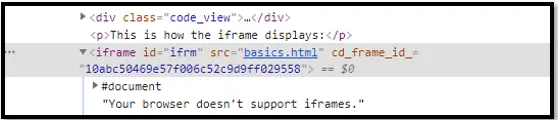
Switch To Iframe
iFrame is an HTML tag that helps to call and display a different web page inside a page. By using the Iframe code, it is possible to display another website or the page of another website from within a page. Thus, the user can access the site from the same page without having to go to that link. You can switch within these windows using the Switch to iFrame activity.
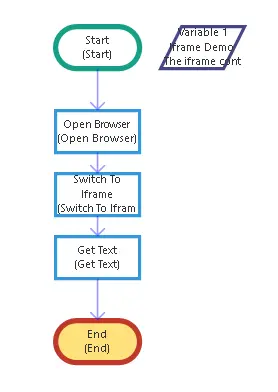
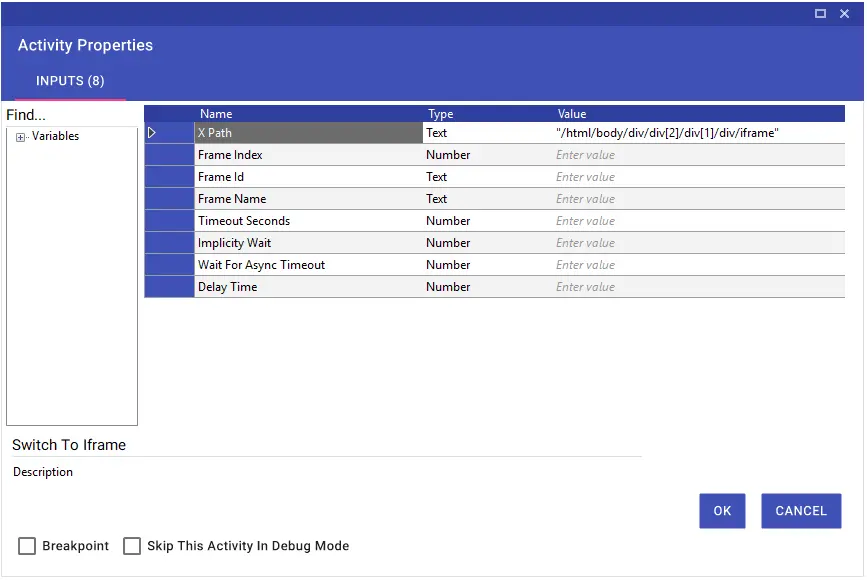
Iframe transitions are made using the Xpath, Frame Index, Frame Id and Frame Name parts. In the transition with Xpath, the relevant Frame Xpath is entered directly or Dynamic Xpath is used. In the Dynamic Xpath example in the image, the frame the name part of which starts with “detail-ext-gen-listdetail” has been detected.

Switch To Tab
With the Switch To Tab activity, you can switch between tabs open on the browser.
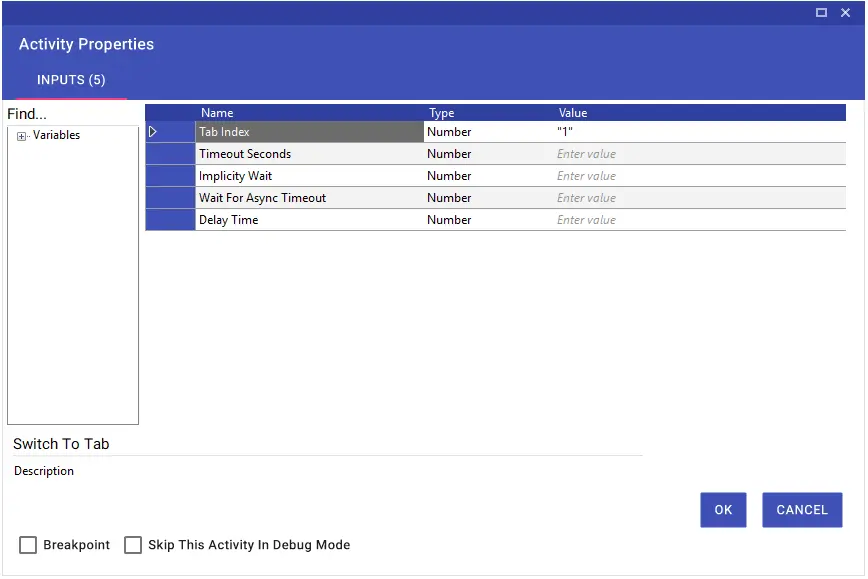
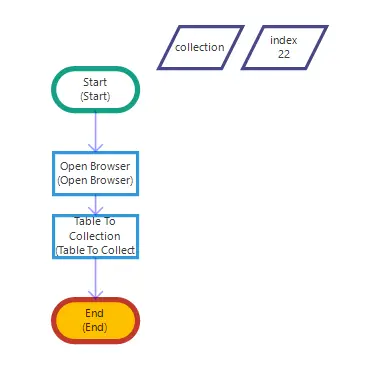
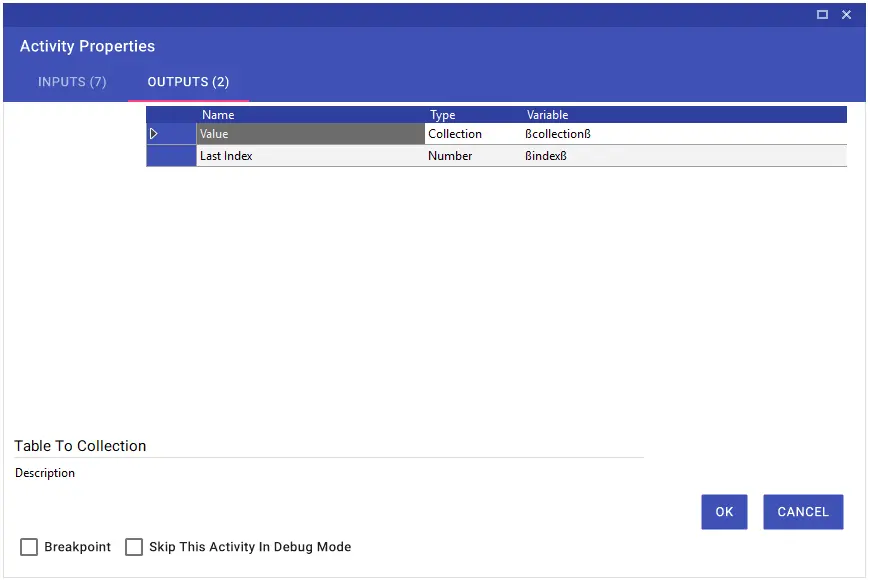
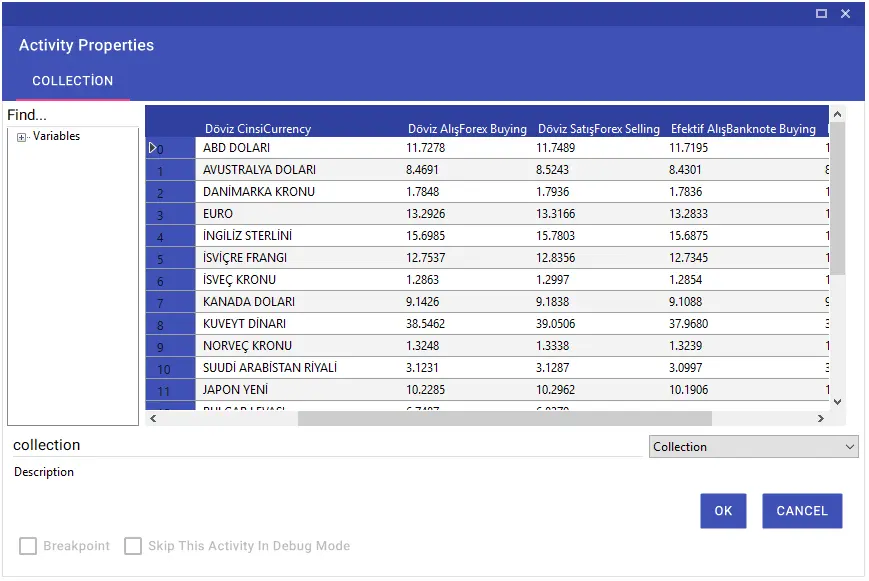
Table To Collection
Using the Table To Collection activity, you can import a table on the website into a variable in collection format with the help of xpath, element id or selector. You can also convert the collection table you have created to Excel format with the “Collection To Excel” activity and use it in the flow.
Note: It is very important that the New Variable, from which you will receive the table, is in collection format.

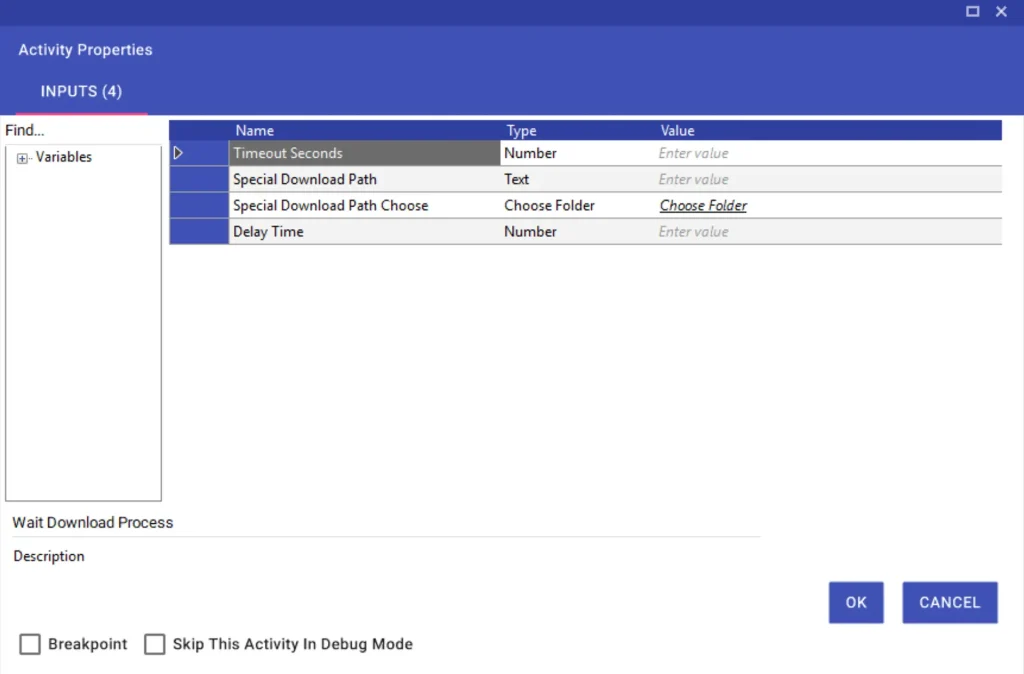
Wait Download Process
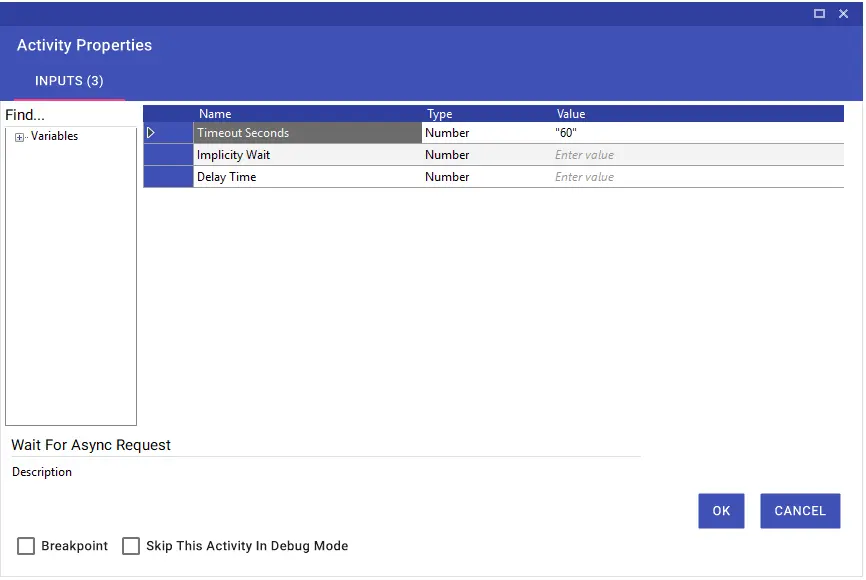
Wait for Async Request
Using the Wait for Async Request activity, you can wait for the web pages with unknown or late loading times within the loading time, thus preventing timeouts. Entry must be made in seconds.
Besides, the Wait For Async Request activity is included as a Wait For Async Timeout parameter in certain activities under the browser. Thus, you can manage this process without having to add a new activity.

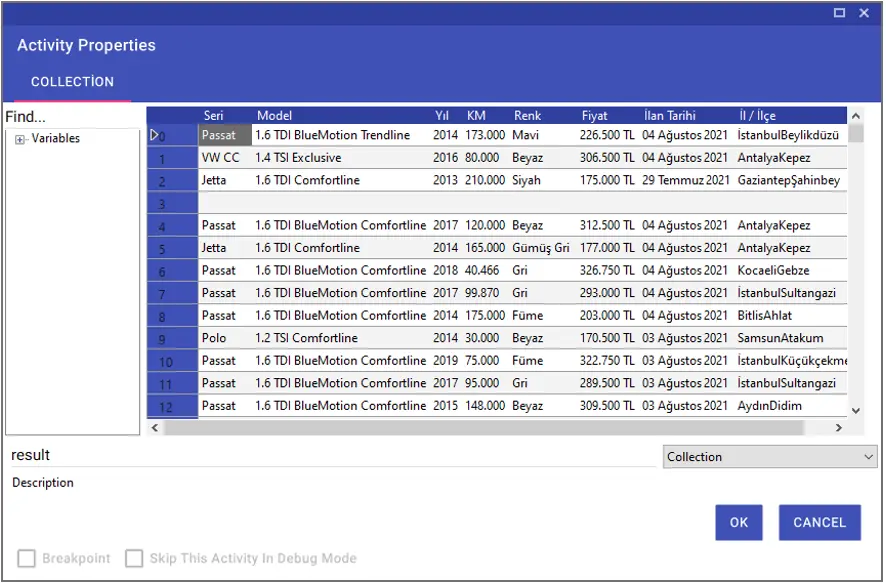
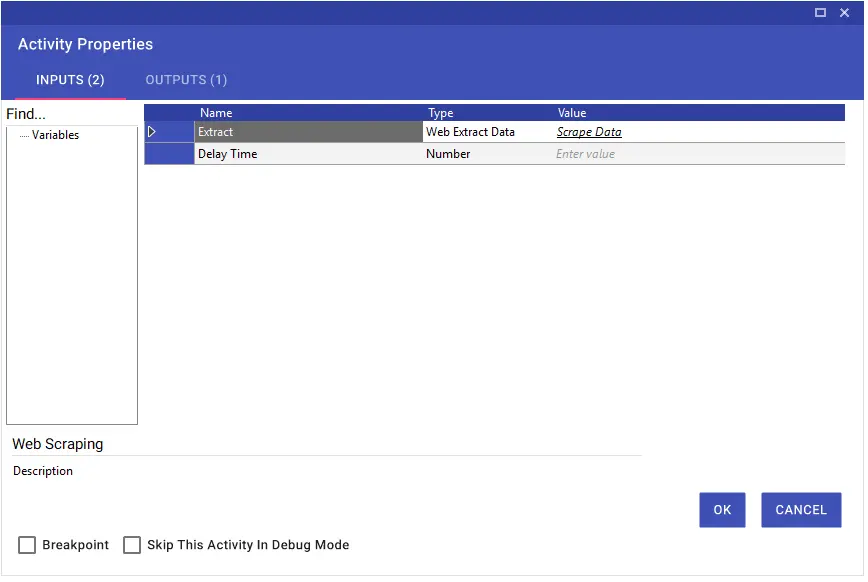
Web Scraping
With the Web Scraping feature, you can export tables, sorted text, etc. fields on websites to variables of Collection type at one time. You can run the Web Scraping wizard by clicking the “Web Scraping” button on the Studio screen.

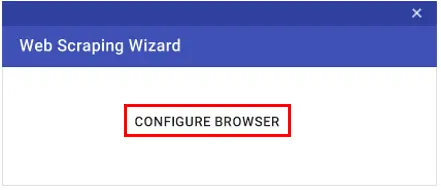
You can enter the website information to be processed by clicking the “Configure Browser” button in the window that opens.

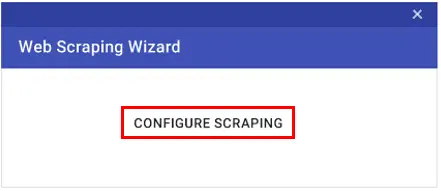
After the website information is entered, you can click on the “Configure Scraping” button and perform the operations related to the table to be imported.
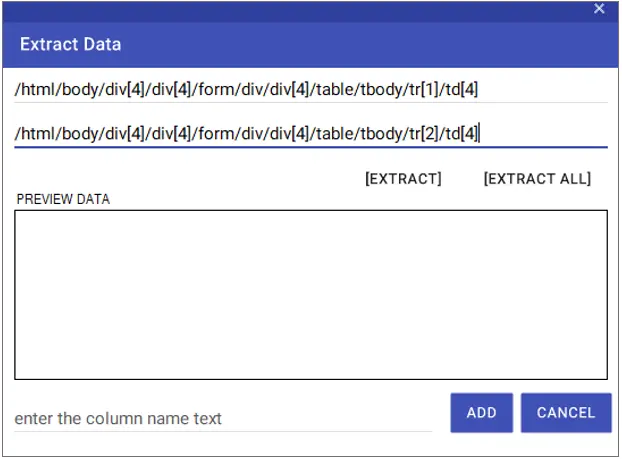
On the screen that opens after clicking the “Scrape Data” > “Extract” buttons respectively, the Xpath information of the two sequential rows of the table is entered into the relevant fields.
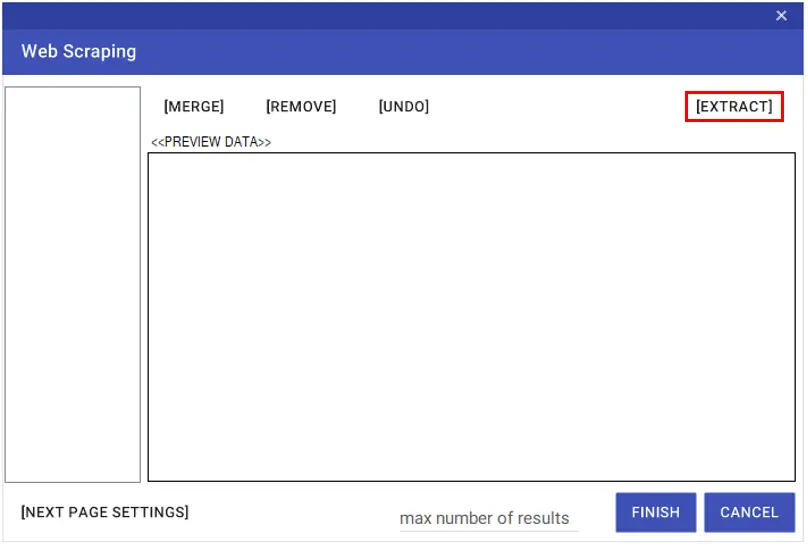
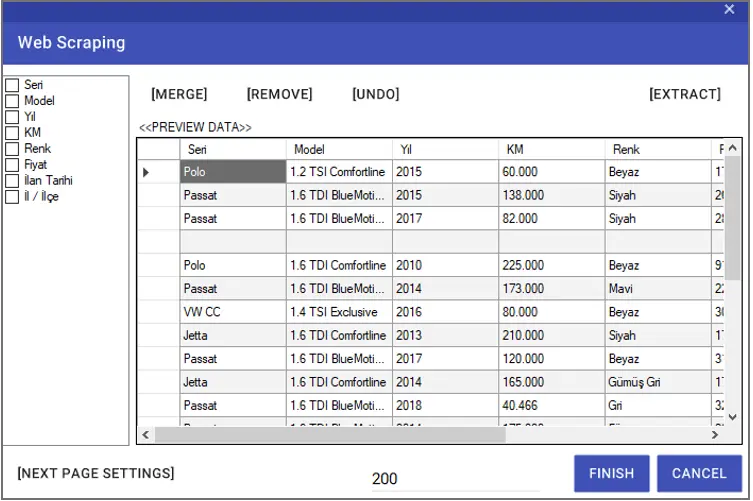
With the “Extract” button, you can add only the column with the entered rows. To give a name to the added column, you can enter the name to be given in the ” Enter the column name text” line. You can complete the column import process by saying “Add”. You can get all columns of the table with the “Extract ALL” button.
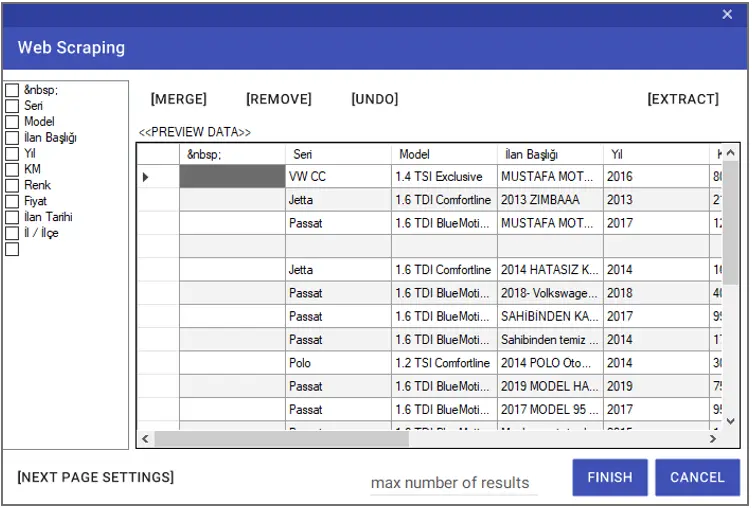
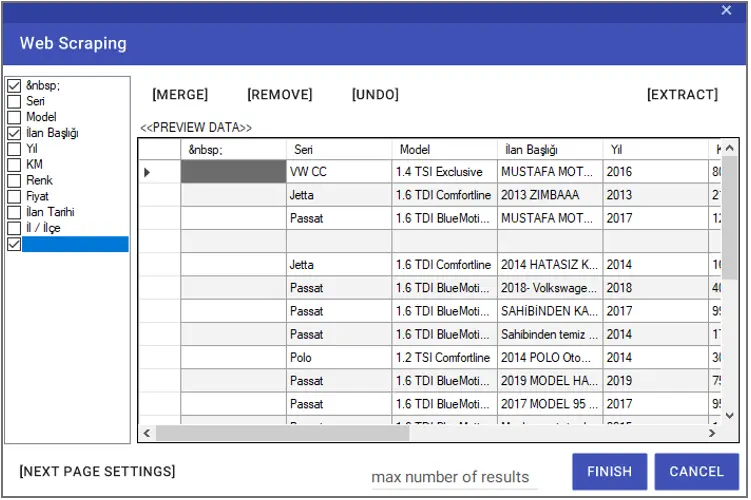
If any, you can select the columns that need to be deleted from the left window and delete them with the “Remove” button. To change the existing names of the columns, you can double-click on the titles in the left window and assign a new name.
You can undo the last operation using the “Undo” button. You can merge the selected columns with the “Merge” button. In order to enter the number of lines to be taken, it is necessary to enter the “Max number of results” line.
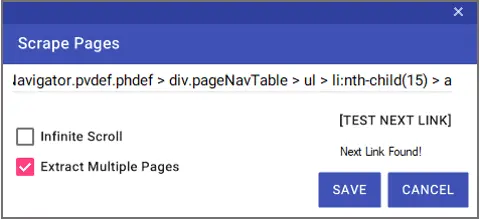
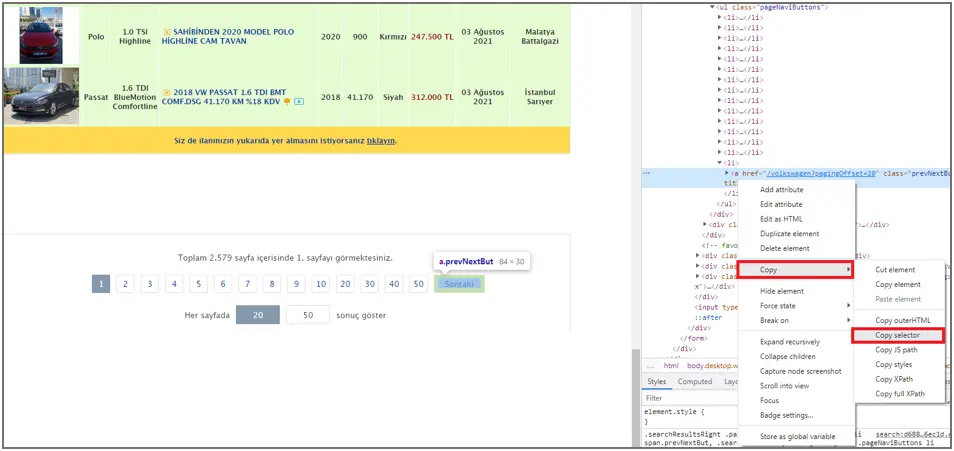
If the records on the website continue from another page, you can make the definitions in the “Next Page Settings” window to get the records here. The “Selector” information of the “Next” button on the web page must be entered in the relevant line in the window. You can test the accuracy of the Selector information entered with the “Test Next Link” button.
To access the “Selector” information, right-click on the source code of the relevant button and select Copy > Copy Selector.
The “Infinite Scroll” option is used to scroll down and access other records on web pages where the next button is not available.
You can save the definitions by pressing the “Save” Button.
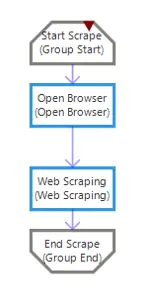
After making all the adjustments, you can close the Web Scraping wizard by clicking the “Finish” button.
After the wizard closes, activities will be added to the design screen as in the image. You can add these activities to the relevant area of the scenario.