Message
Message
Aktiviteler
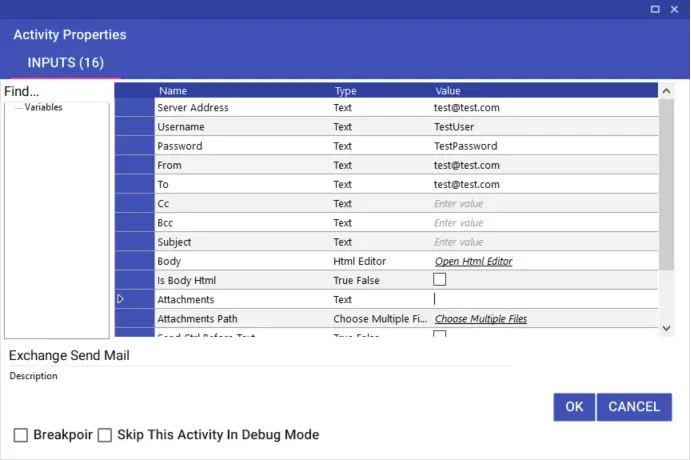
Exchange Send Mail
With Exchange Send Mail activity, you can send mail via Exchange servers.
- ServerAddress: Sunucu Adresi.
- Username: Kullanıcı adı.
- Password: Şifre.
- From: Bu kısma ilgili göndericinin mail adresi yazılır.
- To: Bu kısma gönderilecek kişinin mail adresi yazılır.
- Cc: Bu kısma bilgide gönderilecek kişinin mail adresi yazılır.
- Bcc: Bu kısma gizli bilgide gönderilecek kişinin mail adresi yazılır.
- Subject: Konu.
- Body: Mail İçeriği.
- IsBodyHtml: Mail içeriğin html için true seçeneği işaretlenir.
- Attachments: Ek dosyanın bulunduğu yol bilgisi.
- AttachmentsPath: Ek dosyanın bulunduğu yol bilgisi seçimi.
- SendCtrlBeforeText: Hafızada kopyalanan veriyi yapıştırır.
- LinkedResources: Bağlantılı linkler yazılır.
- FollowUpDateTime: Takip edilecek tarih ve saat bilgisi.
- DelayTime: Bekleme Süresi
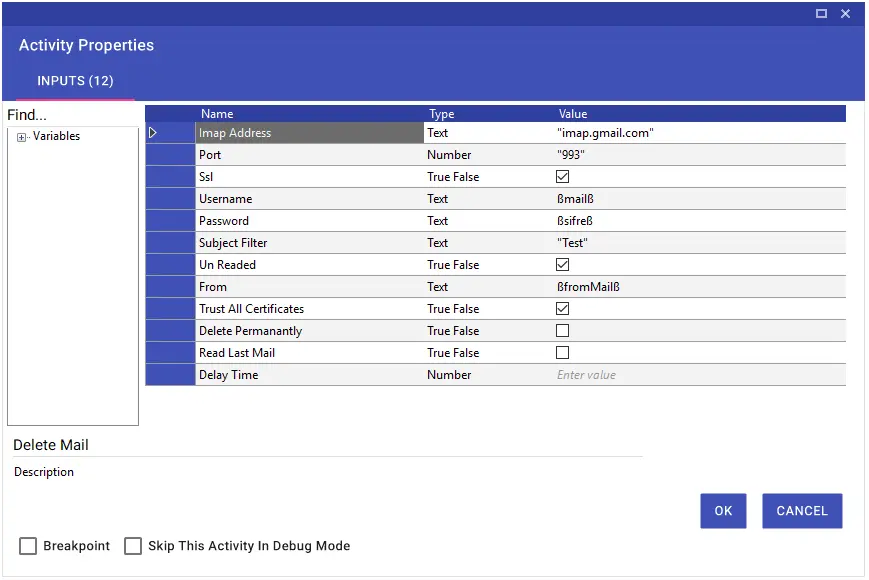
Delete Mail
Using the Delete Mail activity, you can delete mail according to the sender address and mail subject from the incoming mails.
- If the Delete Permanently option is checked, the specified mail will be deleted without being thrown into the trash.
- If the Read Last Mail option is checked, only the most recent mail received will be deleted by looking at the sender address and mail subject specified.
Forward Mail
The Forward Mail activity allows you to forward a mail that has been read with Imap Get Mail via mail ID.
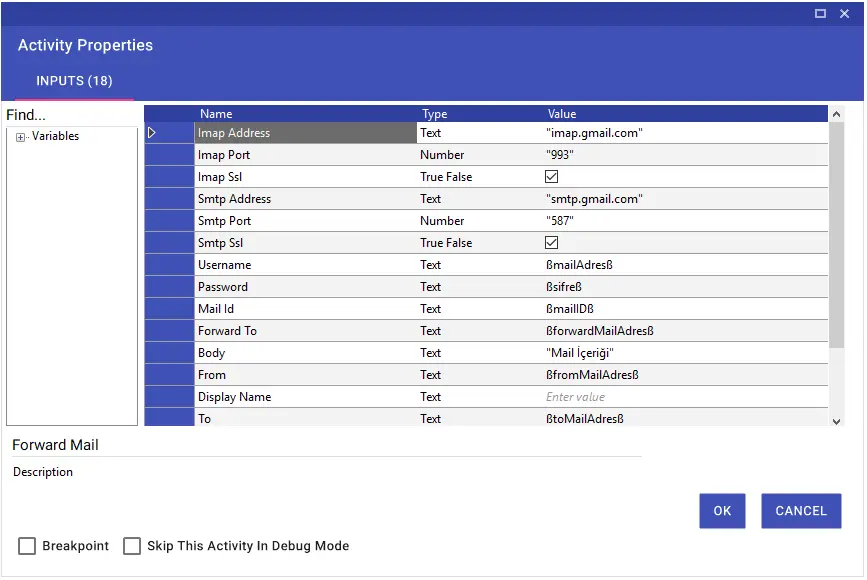
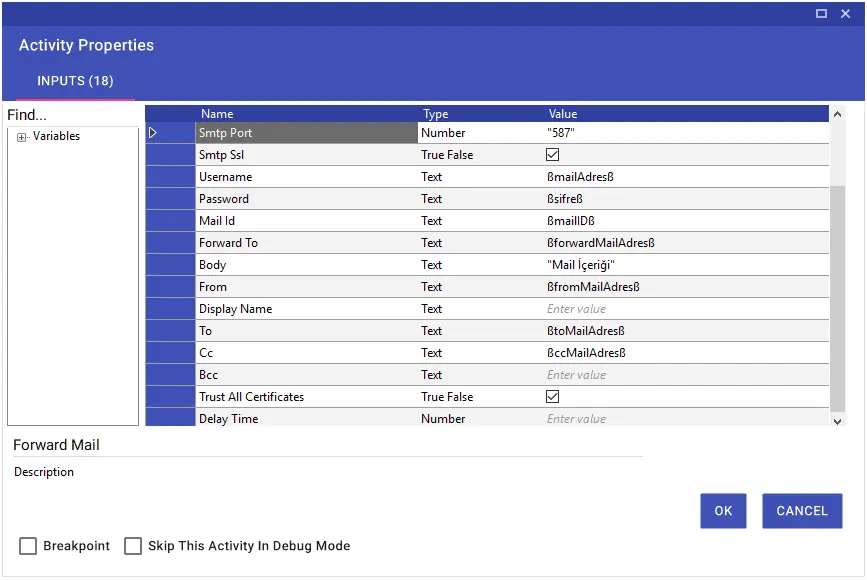
Note: The information in the image is purely illustrative. It varies according to the situation and need.
In order to be able to forward the e-mail, the following steps should be taken as a basis:
- Imap Address: “Server Name”
- Imap Port: “Port”
- Imap Ssl (Secure Sockets Layer): “True” or “False”
- Smtp Address: “Server Name”
- Smtp Port: “Port”
- Smtp SSL (Secure Sockets Layer): “True” or “False”
- Username: “Username”
- Password: “Password Info”
- Mail ID: Mail ID information that has been taken to the variable with the Imap Get Mail activity
- Forward To: Information on whom the mail will be forwarded
- Body: The contents of the mail
- From: Information on who the mail will go from
- Display Name: Display name information
- To: Information on who the mail will go to
- CC: “CC” information if available
- Bcc: “Bcc” information if available
- Trust All Certificates: “True” or “False”
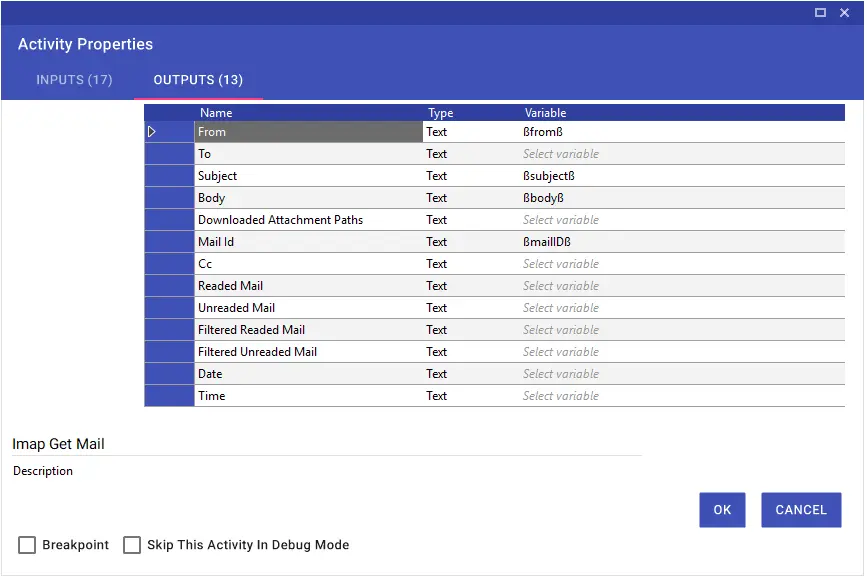
IMAP Get Mail
Using the Imap Get Mail activity, you can read an incoming mail via Imap Address, Port and Ssl information and perform an operation according to the flow.
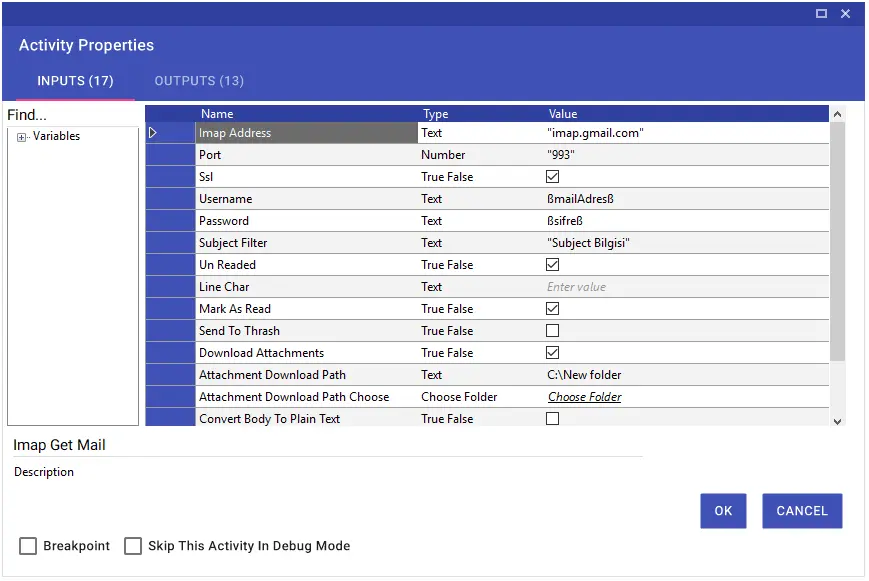
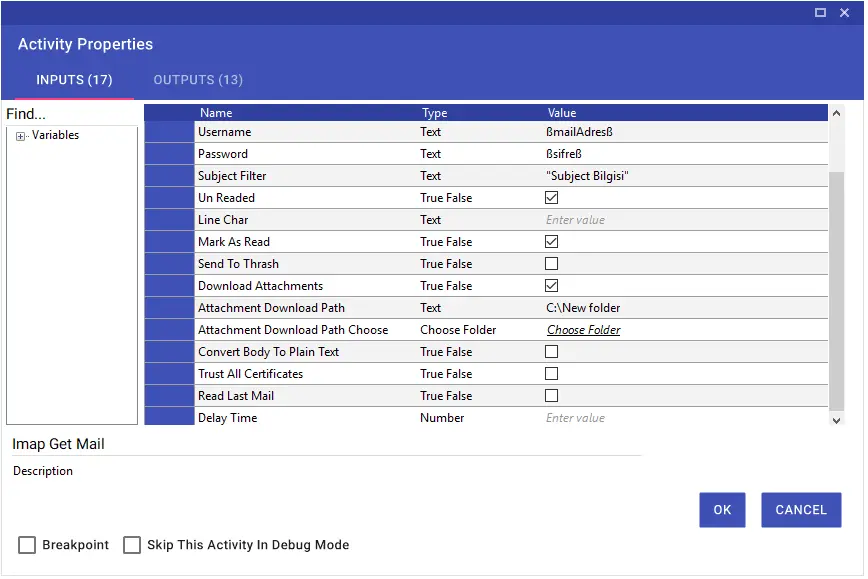
Note: The information in the image is illustrative.
In order to read an incoming e-mail, it is necessary to pay attention to the following steps:
- Imap Address: “Server Name”
- Port: “Port”
- SSL (Secure Sockets Layer): “True” or “False”
- Username: “Username”
- Password: “Password Info”
- Subject Filter: The subject of the mail
- Unread: “True” for unread mails, “False” for read mails
- Line Char: Line character
- Mark As Read: “True” to get mail read
- Send To Thrash: “True” to delete the read mail
- Download Attachments: “True” if there are files that need to be downloaded
- Attachment Download Path: Directory information of the file to be downloaded
- Convert Body To Plain Text: “True” to convert the body of mail to plain text
- Trust All Certificates: “True” or “False”
- Read Last Mail: Read the last filtered email
After reading the mail, you can use the output parameters to transfer the information you need to variables and use it in the flow.
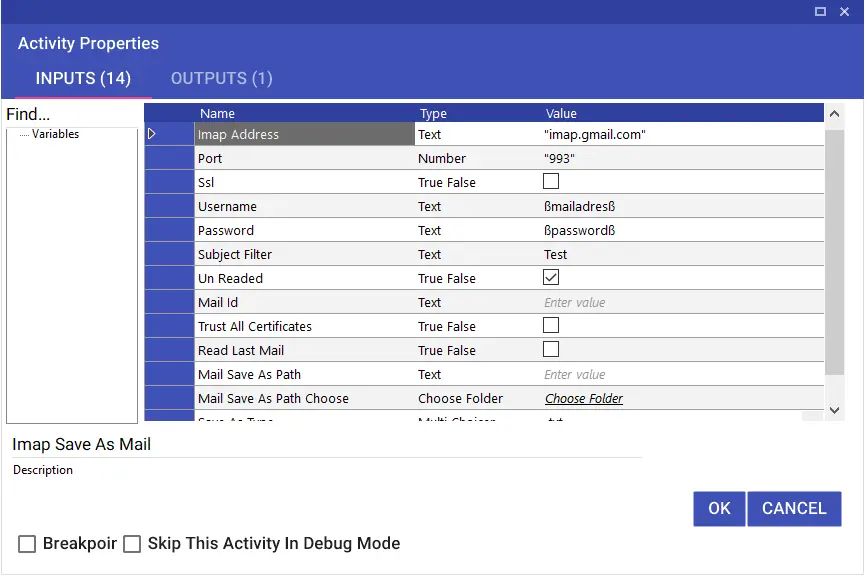
IMAP Save As Mail
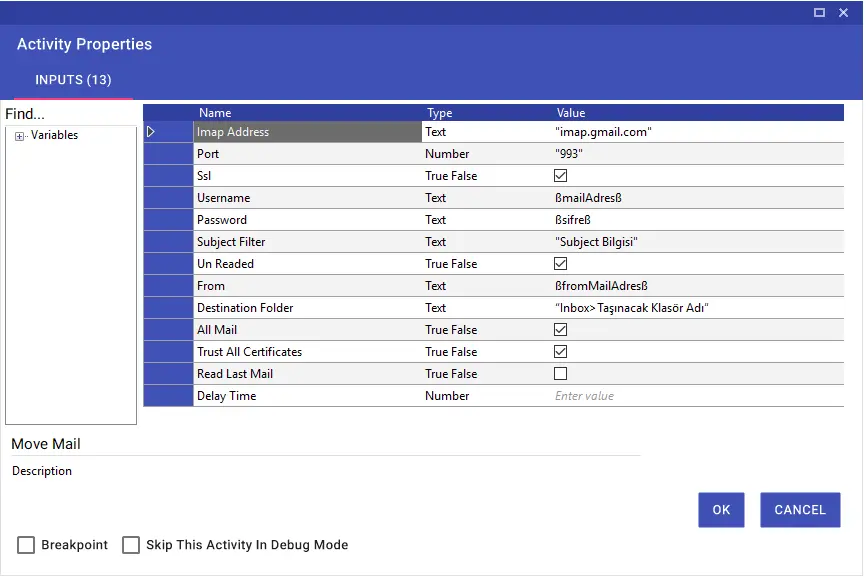
Move Mail
Using the Move Mail activity, you can move the mails in the inbox to a different folder that you have created before.
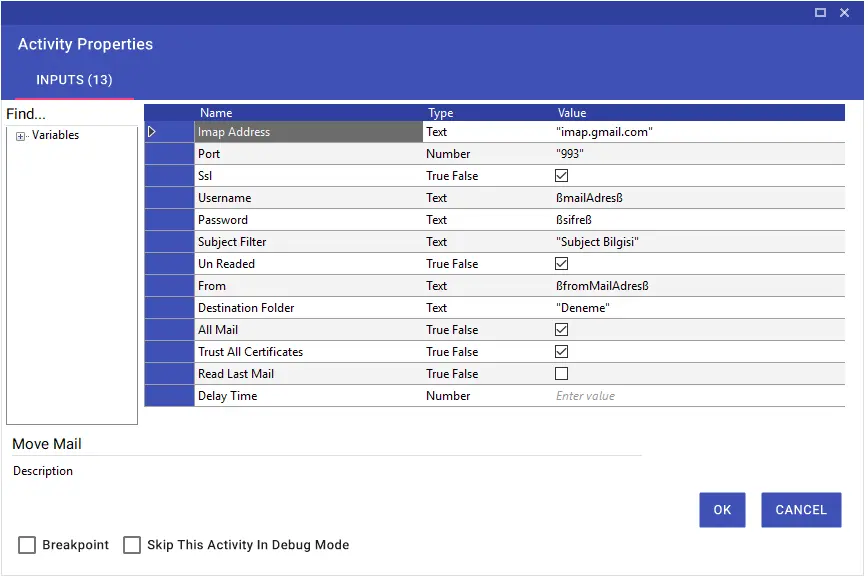
Note: The information in the image is illustrative.
In order to move an incoming e-mail, it is necessary to pay attention to the following steps:
- Imap Address: “Server Name”
- Port: “Port”
- SSL (Secure Sockets Layer): “True” or “False”
- Username: “Username”
- Password: “Password Info”
- Subject Filter: The subject of the mail
- Unread: “True” for unread mails, “False” for read mails
- From: Information about who the mail is coming from
- Destination Folder: The name of the folder to which the mails will be moved is written.
- All Mail: If marked as “True”, all e-mails belonging to the sender address and the subject of the mail will be moved.
- Trust All Certificates: “True” or “False”
- Read Last Mail: Read the last filtered email
Note: The folder must have been created prior to the move. It is also important for users who are performing operation with Outlook to enter the Destination Folder line in the format “Inbox>Folder Name to Move”.
Reply Mail
The Reply Mail activity allows you to reply to the message you have read with Imap Get Mail via the mail ID variable.
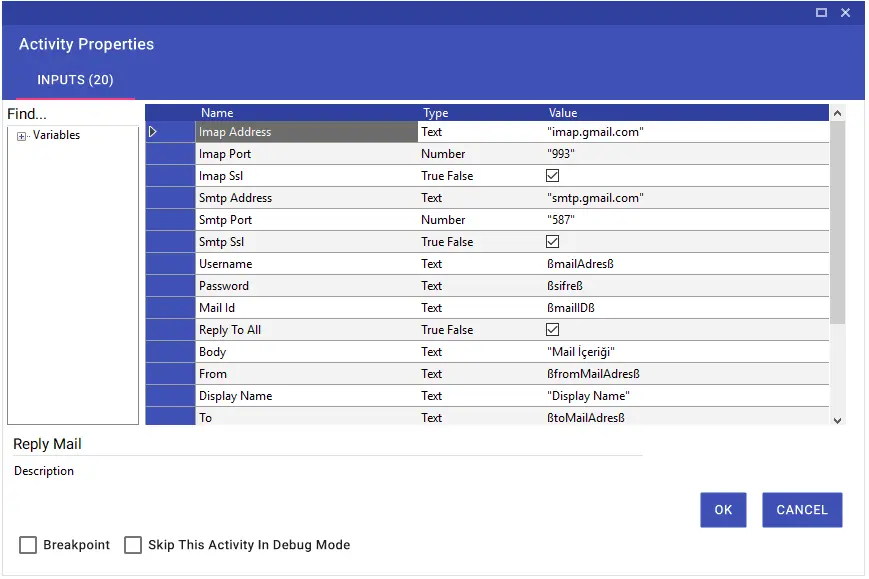
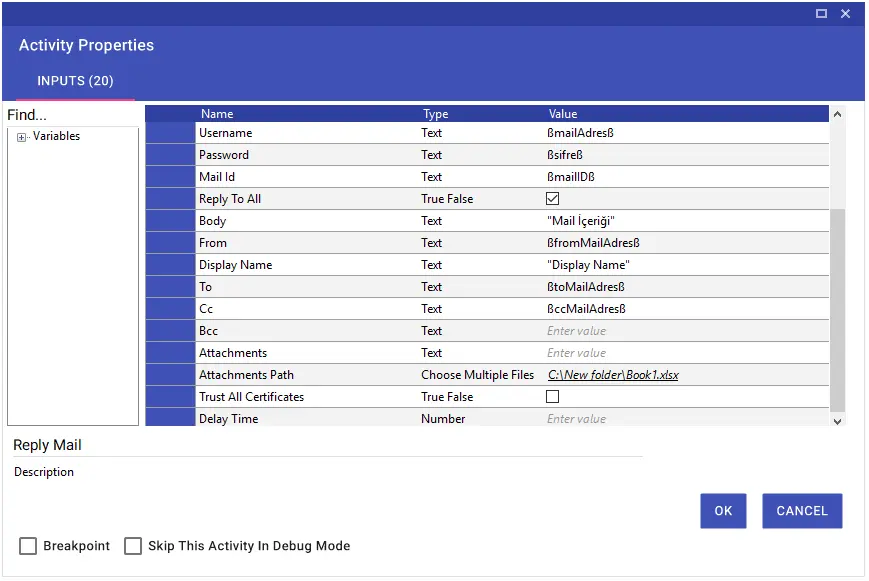
Note: The information in the image is purely illustrative.
In order to be able to reply to the mail, it is necessary to pay attention to the following steps:
- ImapAddress: “Server Name”
- Imap Port: “Port”
- Imap Ssl (Secure Sockets Layer): “True” or “False”
- Smtp Address: “Server Name”
- Smtp Port: “Port”
- Smtp SSL (Secure Sockets Layer): “True” or “False”
- Username: “Username”
- Password: “Password Info”
- Mail ID: Mail ID information that has been taken to the variable with the Imap Get Mail activity
- Reply To All: “True” or “False”
- Body: The contents of the mail
- From: Information about who the mail will go from
- Display Name: Display name information
- To: Information on who the mail will go to
- CC: “CC” information if available
- Bcc: “Bcc” information if available
- Attachment: The directory address of the file to send
- Attachment Path: Selection of file to send
- Trust All Certificates: “True” or “False”
SMTP Send Mail
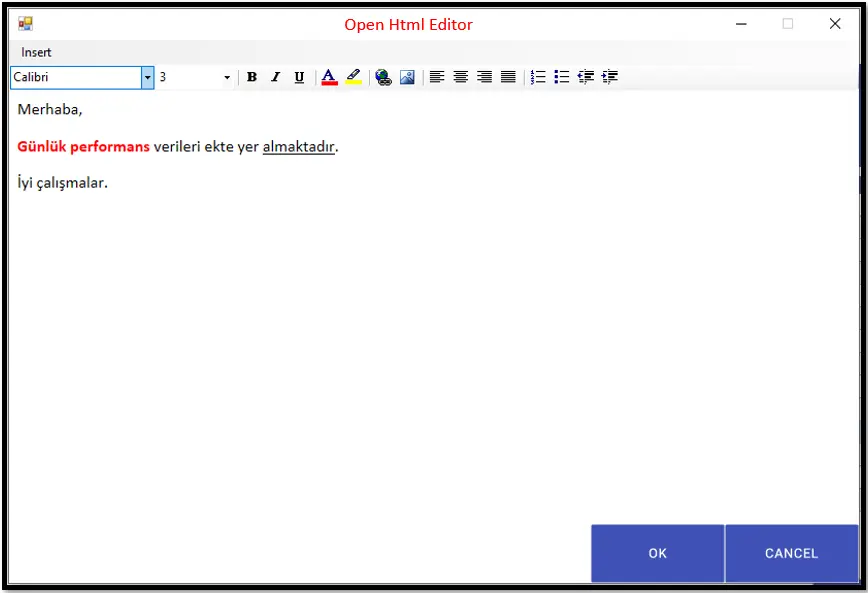
Using the Smtp Send Mail activity, you can send mail via SMTP Address, Port and Ssl information. Using the Open Html Editor window, you can adjust the color, font and font size settings of the message you want to forward, use variables or add a file or files to your e-mail according to your needs, and you can send your messages in Html format with the Insert button in Open Html Editor. However, for this process, the Is Body Html line must be selected as “True”.


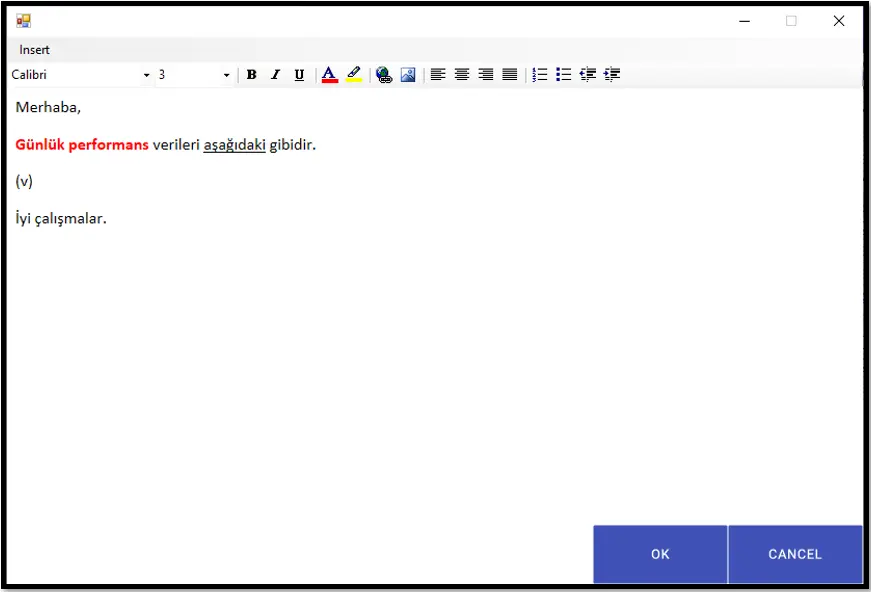
By using the Send Ctrl Before Text input in the Smtp Send Mail activity, you can add the data copied or cut from Excel or a different field to your mail without losing the format.
For this process, Send Ctrl Before Text and Is Body Html input should be selected as “True”, and (v) command should be written in the field you deem appropriate in the Open Html Editor. This command will add the copied or cut data to the mail. For example, you will be able to add a field that you have copied from Excel with the Cell Value Copy activity to your mail using this method.
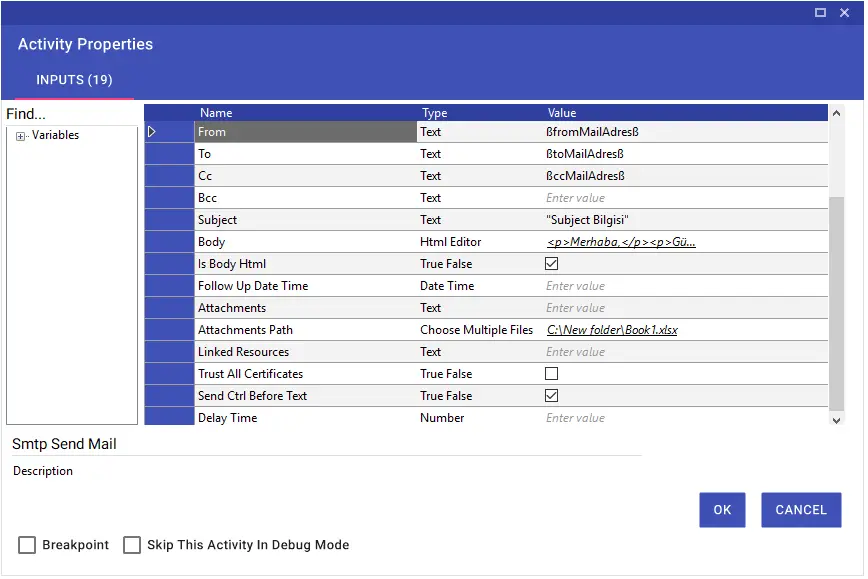
In order to be able to send mail using Smtp Send Mail activity, SMTP Address, Port and Ssl information vary according to the mail account you use. Brief descriptions of the input lines in the activity are as follows:
Note: The information in the image is illustrative.
- SmtpAddress: “Server Name”
- Port: “Port”
- SSL (Secure Sockets Layer): “True” or “False”
- Username: “Username”
- Password: “Password Info”
- From: Information about who the mail will go from
- To: Information on who the mail will go to
- CC: “CC” information if available
- Bcc: “Bcc” information if available
- Subject: Subject of the mail
- Body: The contents of the mail
- Is Body Html: Mail content is “True” if in Html format
- Follow Up Date Time: Adding reminders so that the email can be followed up
- Attachment: The directory address of the file to send
- Attachment Path: Selection of file to send
- Linked Resources: Add a link resource
- Trust All Certificates: “True” or “False”
- Send Ctrl Before Text: “True” so that the value copied to the clipboard can be added to the body with the Ctrl+V command