Global Bilgi RPA (EN)

Apps

Apps

Aktiviteler

App Start

App Start Activity allows you to run applications installed on the device. With this activity, you can start applications and control how they are launched with specific options.

Input Parameters

App Path: Specifies the directory of the application to be launched. This is the field where you need to specify the exact location of the application to be executed.

Example: “C:\Program Files\Microsoft Office\root\Office16\EXCEL.EXE”

App Path Choose: Allows you to select the application to be launched, instead of manually writing the directory. You can browse and select the application from here.

Arguments: This field is used to pass command-line arguments to the application when it is launched. It is used to trigger specific operations or assign properties when the application opens.

Do Not Wait Windows Handle: When checked, the application process starts without waiting for the main window to be created. If there is no need to wait for the process to become idle, this option can be selected; otherwise, the application will wait until it is fully started.

Is Full Screen: If you want the application to be launched in full screen mode, this option should be checked.

Is Minimized: If you want the application to be launched in minimized mode, this option should be checked.

Capture Operation

By using the Capture Operation activity, you can capture the image of a certain area or object on the screen, a button or element in the application, by cropping the image and operate on it.

After clicking on the Capture Area line, you can start capturing the selected area on the screen. When your cropping is complete, the image you captured will appear in the list as selected. If there is more than one image, you can reach the match score by selecting the box next to the image you want to use, and clicking the TEST button and then clicking Ctrl on the keyboard. A high match score is important for your scenario. You can clear all the images you have captured using the Clear button, and you can re-process them using the CAPTURE button.

After the Capture Area selection is made, you can select the appropriate click, doubleclick, rightclick, middleclick, keypress or imageExist commands from the Operation line according to the procedure you are to carry out. If data is to be sent from the keyboard, it will be sufficient for you to fill in the Text line and select the “keypress” command from the Operation line.

Note: While using the activity, the screen must remain on and not locked. Otherwise, the robot receives an error.

You can manually type the shortcut keys in the text line or enter them by drag and drop method using the “Key Codes” window on the left.

You can use the imageExist command to check whether the image you captured exists in the area where you will be processing. If there is an image you have selected with the Capture Area, you can transfer it to a variable as “True” or “False”, and you can design the next step according to the result.

Change Culture

You can change the system’s thousands and decimal separators in Excel using the Change Culture activity. The Change Culture activity should be used before the Workbook Open activity.

Clipboard Text To Variable

The Clipboard Text To Variable activity allows you to put a text or value copied to the clipboard into a variable. For example, with the Cell Value Copy activity, you can use the text or value you copied to the clipboard into the variable with the Clipboard Text To Variable activity.

Coordinates Operation

By using the Coordinates Operation activity, you can perform click, double click, right click, middle click and keypress operations on a specific area or object on the screen, a button or element in the application, using the coordinate method.

Input Parameters

Operation: You can perform click, double click, right click, middle click and keypress operations.

Text: The desired text input field to print data using the Keypress option.

Coordinates: The area where clicking and data printing will be done is selected, and the coordinate information is automatically displayed.

X Coordinate: The first value in the coordinate line

Y Coordinate: The second value in the coordinate line

  • Coordinate information can be entered separately either automatically (Get Coordinates) or manually. If there is no entry, the activity will not run.
  • In case of automatic coordinate selection or manual coordinate selection being made together, manual coordinate selection will run.
  • If any of the X or Y values are not entered in the manual coordinate selection, the coordinate data obtained with “Get Coordinates” will run. Otherwise, the activity will not run.

Copy Text To Clipboard

The Copy Text To Clipboard activity is used to copy a text, variable or value to the clipboard. You can transfer the value you copied to the clipboard to a different variable with the Clipboard Text To Variable activity, and paste it using the CTRL+V command or the Cell Value Paste activity.

Delay

By using the delay activity, you can give a waiting time to certain points in the scenario flow. The waiting time must be entered in milliseconds.

Example: 1s = “1000”

Element Click

The Element Click activity is used to be able to click on any application or object. While making a selection, highlight the element to be selected and press the CTRL key. After selecting the element, the number of matching queries is checked by clicking the TEST button.

If the application title changes at every startup, it is sufficient to write “*” from the point where the value in the Main Window Name and Window Name lines has changed. In this way, the element will be captured even if the title changes.

In cases where the elements cannot be captured as objects, coordinate selection can be made. In order to be able operate on the coordinate, it will be sufficient for you to activate the Screen X and Screen Y lines.

Note 1: If the coordinate information changes, the operation will not take place.

Note 2:While using the activity, the screen must remain on and not locked. Otherwise, the robot receives an error.

Element Exists

Using the Element Exists activity, you can check whether the desired element exists in windows-based applications. By clicking the Pick button from the Element Picker table, you can select the windows objects and perform operation. For example, in the scenario below, if notepad is open, it writes the text received. If notepad is closed, the scenario ends.

Element Property Get

Using the Element Property Get activity, you can get the property of the selected object and pass it to a variable.

If the application title changes at every startup, it is sufficient to write “*” from the point where the value in the Main Window Name and Window Name lines has changed. In this way, the element will be captured even if the title changes.

In cases where the elements cannot be captured as objects, coordinate selection can be made. In order to be able to operate on the coordinate, it will be sufficient for you to activate the Screen X and Screen Y lines.

Note 1: If the coordinate information changes, the operation will not take place.

Note 2: While using the activity, the screen must remain on and not locked. Otherwise, the robot receives an error.

Element Value Clear

If the “Value” line of an element you picked is full, you can delete it using the Element Value Clear activity.

If the application title changes at every startup, it is sufficient to write “*” from the point where the value in the Main Window Name and Window Name lines has changed. In this way, the element will be captured even if the title changes.

In cases where the elements cannot be captured as objects, coordinate selection can be made. In order to be able to operate on the coordinate, it will be sufficient for you to activate the Screen X and Screen Y lines.

Note 1: If the coordinate information changes, the operation will not take place.

Note 2: While using the activity, the screen must remain on and not locked. Otherwise, the robot receives an error.

Element Value Get

Using the Element Value Get activity, if the “Value” line of the selected object is full, you can get this value and pass it to a variable.

If the application title changes at every startup, it is sufficient to write “*” from the point where the value in the Main Window Name and Window Name lines has changed. In this way, the element will be captured even if the title changes.

In cases where the elements cannot be captured as objects, coordinate selection can be made. In order to be able to operate on the coordinate, it will be sufficient for you to activate the Screen X and Screen Y lines.

Note 1: If the coordinate information changes, the operation will not take place.

Note 2: While using the activity, the screen must remain on and not locked. Otherwise, the robot receives an error.

Element Value Set

Using the Element Value Set activity, if the “Value” line of the selected object is blank, you can print the desired value.

If the application title changes at every startup, it is sufficient to write “*” from the point where the value in the Main Window Name and Window Name lines has changed. In this way, the element will be captured even if the title changes.

In cases where the elements cannot be captured as objects, coordinate selection can be made. In order to be able to operate on the coordinate, it will be sufficient for you to activate the Screen X and Screen Y lines.

Note 1: If the coordinate information changes, the operation will not take place.

Note 2: While using the activity, the screen must remain on and not locked. Otherwise, the robot receives an error.

Global Key Press

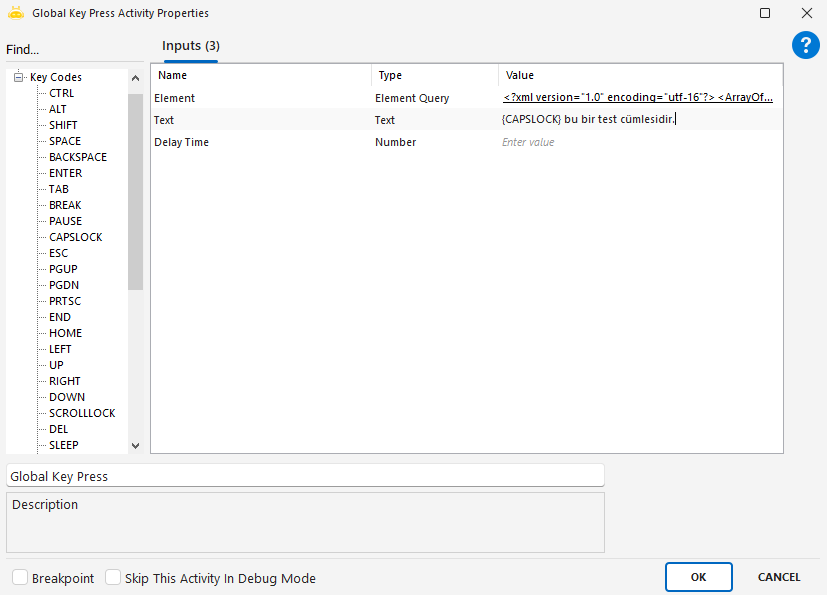
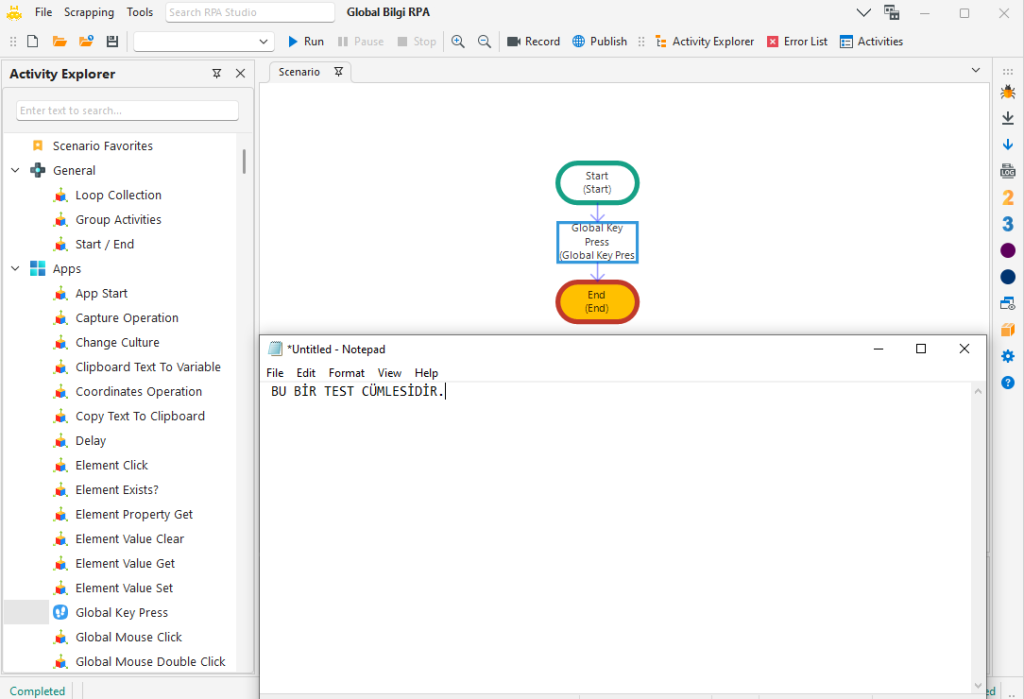
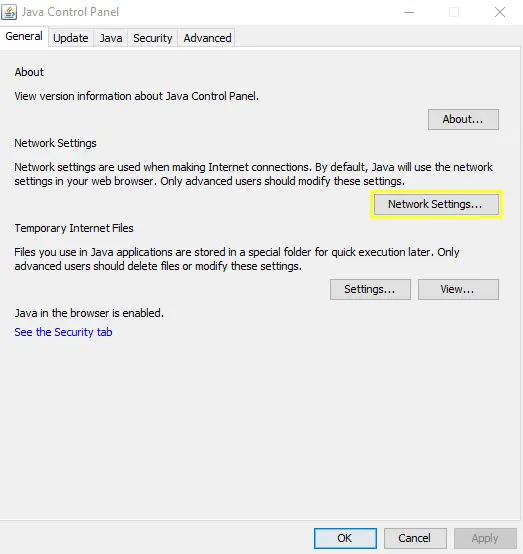
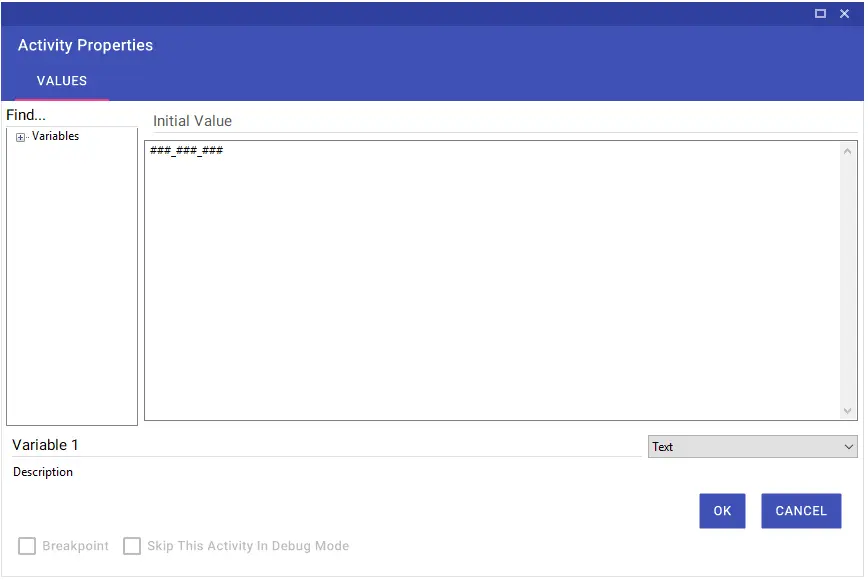
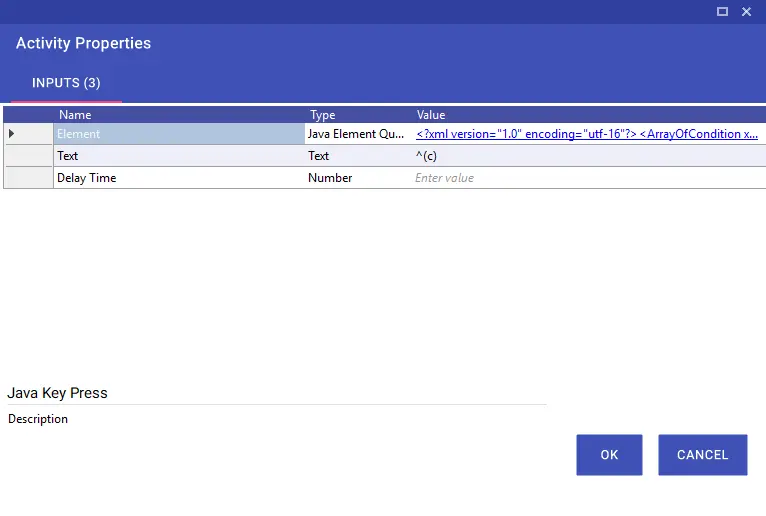
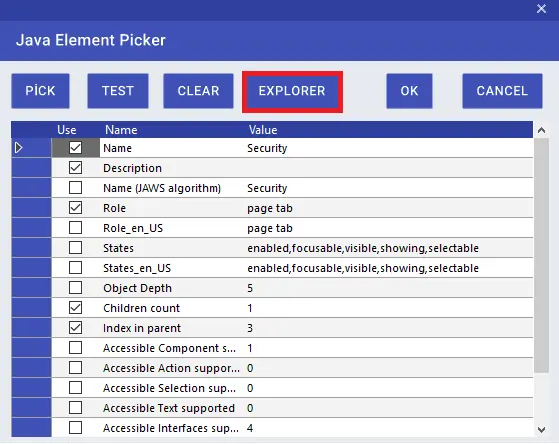
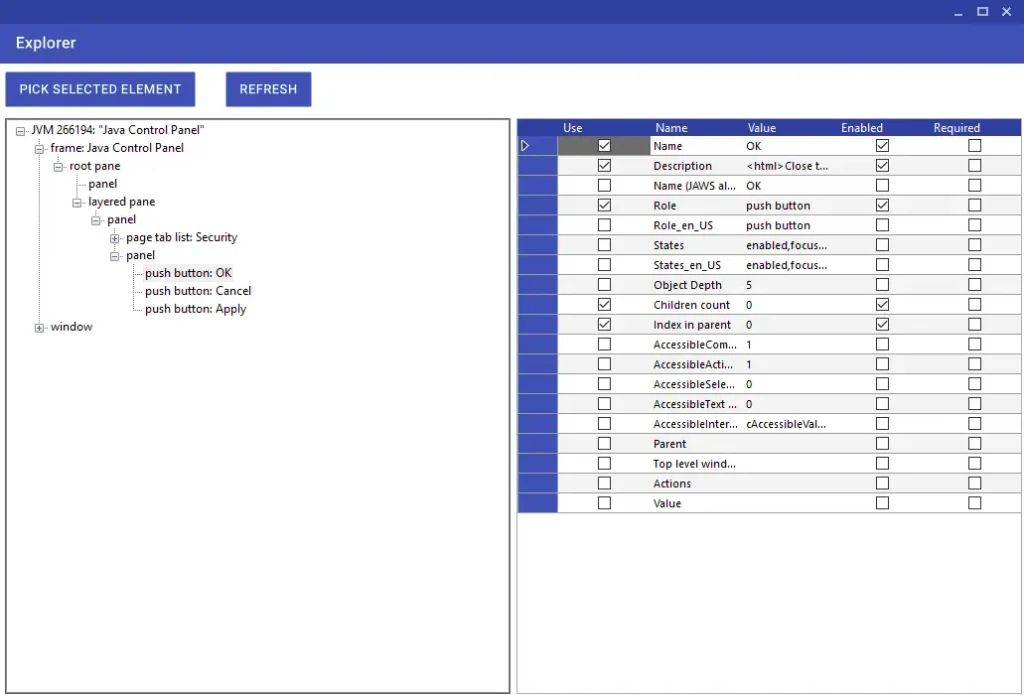
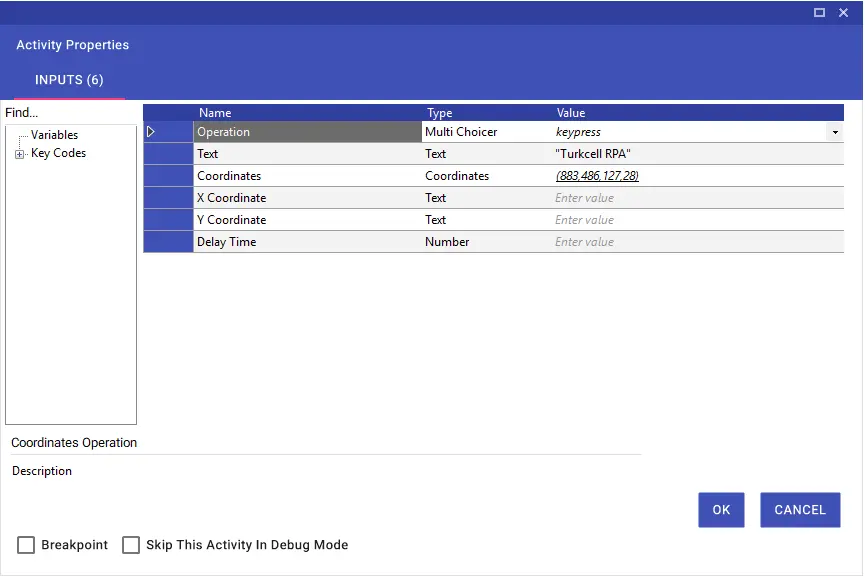
This activity simulates keyboard key presses on an active application or screen, allowing actions such as typing text, triggering shortcut commands, or filling forms. For the keystrokes to be applied correctly, the screen must be unlocked, visible, and focused on the target application. Incorrect focus may cause the input to be sent to the wrong window. If the screen resolution changes or the process relies on coordinates, commands may be applied inaccurately. Some virtual desktop environments may block keyboard simulation. Parenthesis characters must be written inside curly braces when sending them. Example: {(}test{)}.

Usage Scenarios

  • Sending shortcut keys to trigger system or application actions

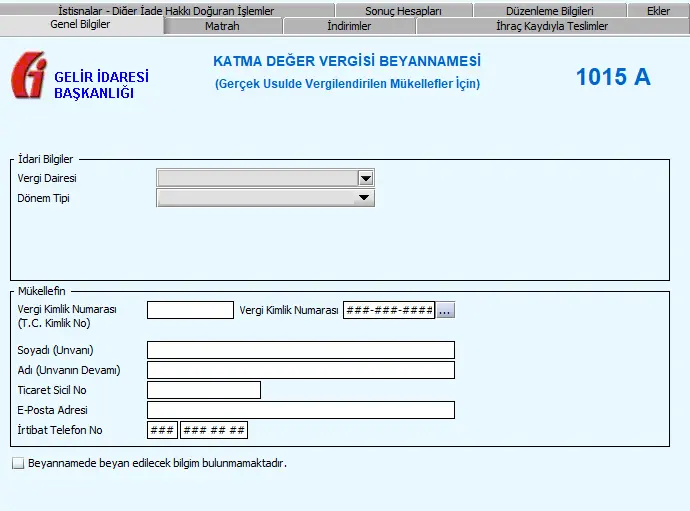
  • Typing text into input fields

  • Navigating through forms using keyboard commands

  • Automating processes that require manual keystrokes
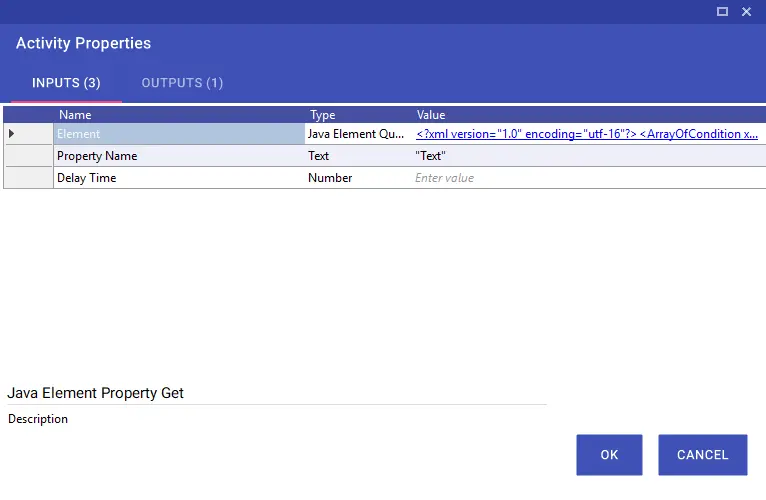
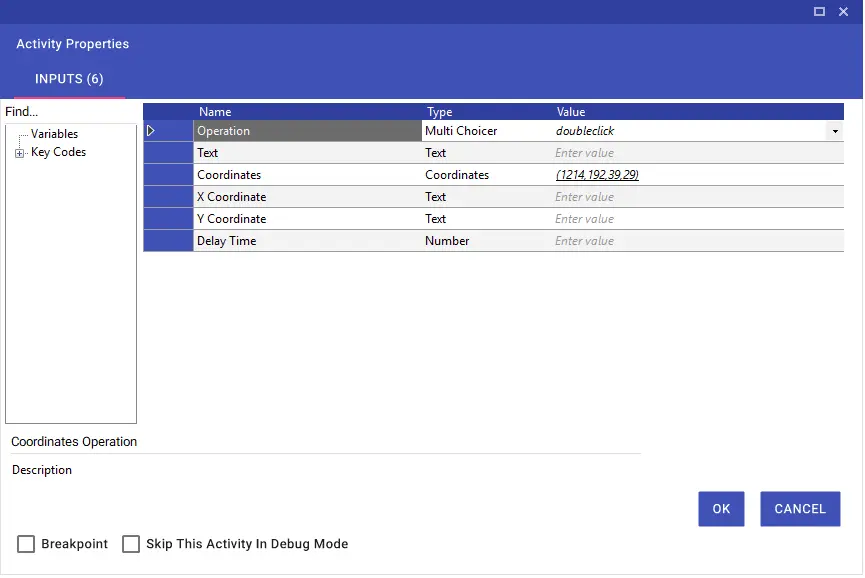
Parameters

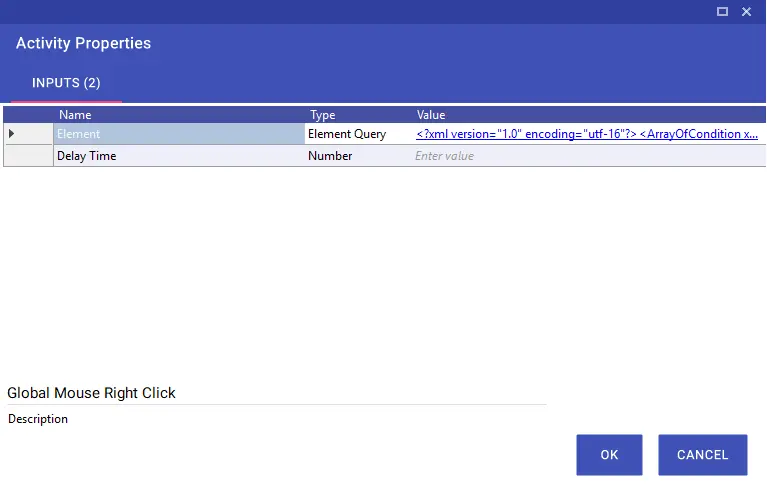
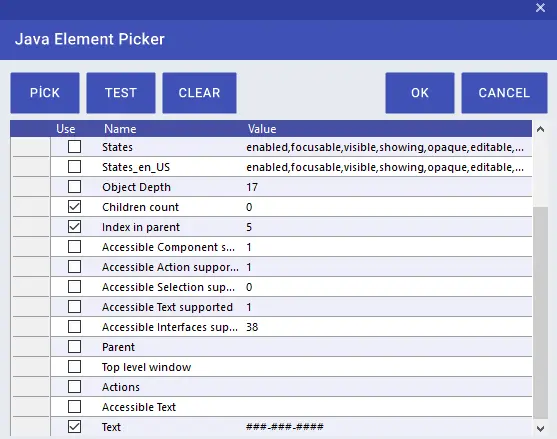
  • Keys: The key or key combination to be sent (e.g., Enter, Ctrl+C, Ctrl+S)

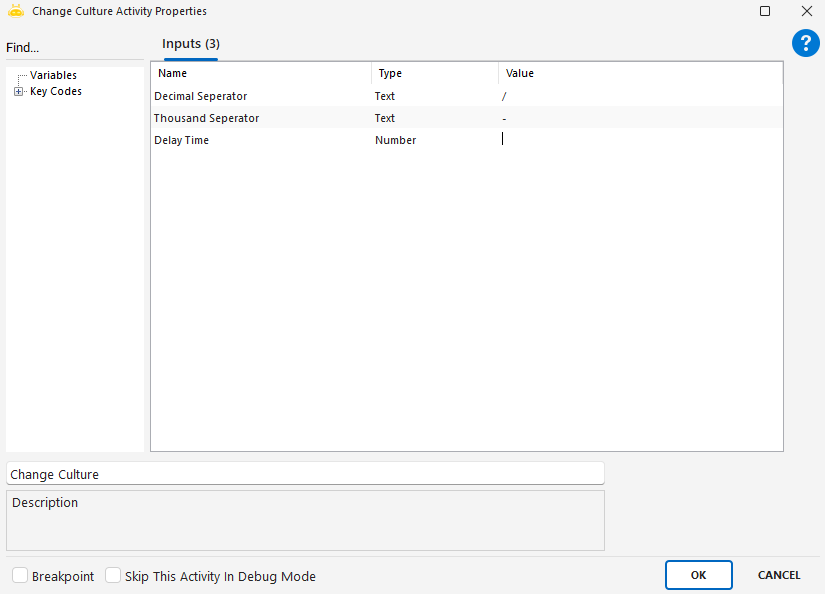
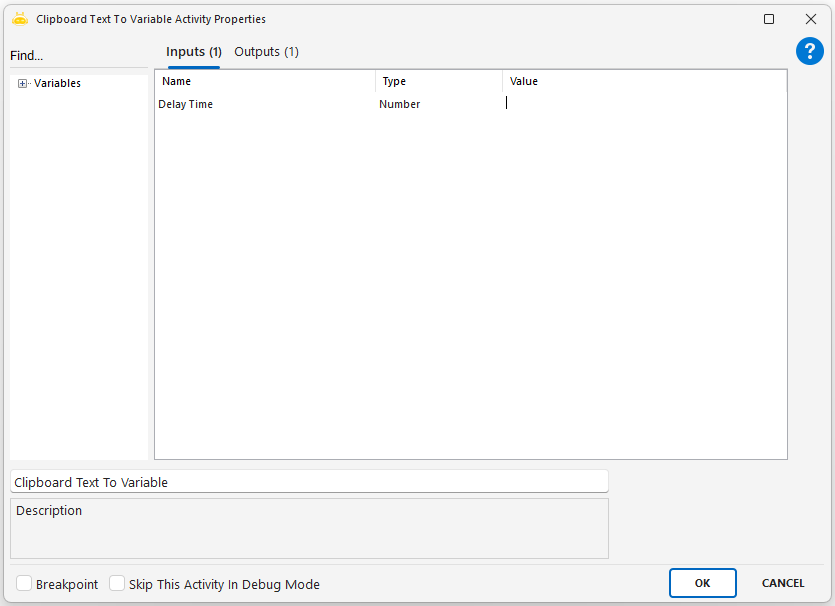
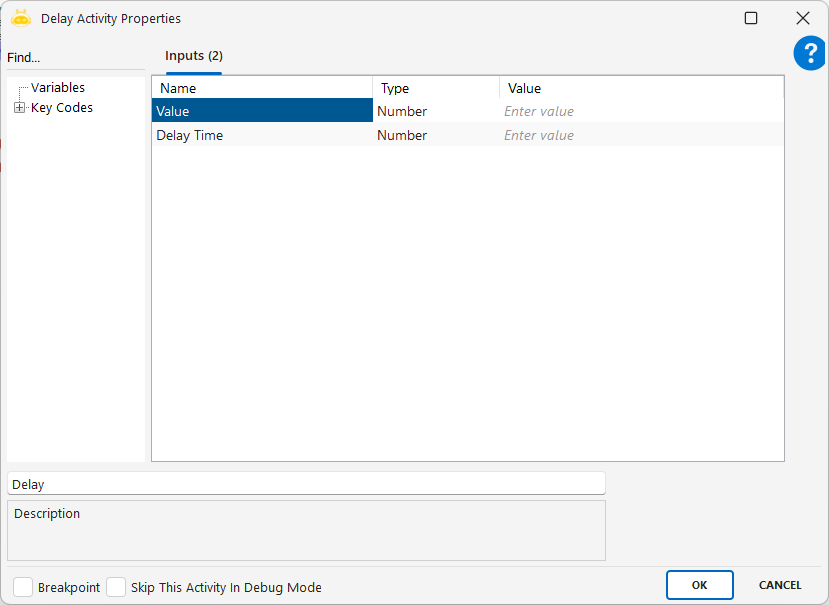
  • Delay Time: Waiting time before execution (milliseconds)

Notes

  • The target window must be active and visible.

  • Curly braces are required for special characters such as parentheses.

  • Some remote or virtual machines may restrict keyboard simulation.

Steps to Use

  1. Add the activity to the workflow.

  2. Click the Pick button and select the target element. Hover over the element and press CTRL to capture it.

  3. Enter the key or key combinations in the Text field.

  4. If preferred, drag and drop commands from the Key Codes list in the left panel.

  5. If the application window title changes on each launch, place a “*” after the stable part of the text in Main Window Name and Window Name. This allows the element to be detected even when the title varies.

  6. If multiple elements are detected, refine the identification criteria in the EXPLORER tab by selecting distinguishing attributes such as Name, Role, or Index in parent.

In cases where the elements cannot be captured as objects, coordinate selection can be made. In order to be able to operate on the coordinate, it will be sufficient for you to activate the Screen X and Screen Y lines.

Note 1: If the coordinate information changes, the operation will not take place.

Note 2: While using the activity, the screen must remain on and not locked. Otherwise, the robot receives an error.

Notes

  • If coordinate information changes, the action will not execute successfully.

  • The screen must remain open and unlocked while the activity runs; otherwise, an error will occur.

  • Shortcut keys can be typed manually in the Text field or added via drag-and-drop from the Key Codes panel.

  • Examples for the Text field:

    • Alt+S → %{S}

    • Ctrl+C → ^(c)

Key Code Key Code
SPACE ” “ BACKSPACE {BACKSPACE}, {BS}, {BKSP}
BREAK {BREAK} CAPS LOCK {CAPSLOCK}
DEL / DELETE {DELETE} / {DEL} DOWN ARROW {DOWN}
END {END} ENTER {ENTER} / ~
ESC {ESC} HELP {HELP}
HOME {HOME} INS / INSERT {INSERT} / {INS}
LEFT ARROW {LEFT} NUM LOCK {NUMLOCK}
PAGE DOWN {PGDN} PAGE UP {PGUP}
PRINT SCREEN {PRTSC} RIGHT ARROW {RIGHT}
SCROLL LOCK {SCROLLLOCK} TAB {TAB}
UP ARROW {UP} F1 {F1}
F2 {F2} F3 {F3}
F4 {F4} F5 {F5}
F6 {F6} F7 {F7}
F8 {F8} F9 {F9}
F10 {F10} F11 {F11}
F12 {F12} F13 {F13}
F14 {F14} F15 {F15}
F16 {F16} Keypad add {ADD}
Keypad subtract {SUBTRACT} Keypad multiply {MULTIPLY}
Keypad divide {DIVIDE} CTRL C ^(c)
CTRL V ^(v)

Global Mouse Click

The Global Mouse Click activity is used to click an element within application windows or on the desktop. If direct access to the element is possible, it can be selected directly; if not, coordinate-based clicking can be used. It is commonly used to start actions, select elements, check boxes, or open menus. The correct element must be selected; otherwise, the action may be applied to the wrong area. If coordinates are used, resolution changes may cause the click to fail. This activity is one of the most frequently used steps in visual or element-based automation.

ChatGPT:

Usage Steps

  • Add the activity to the workflow.

  • Click the Pick button and select the element to be clicked.

  • Hover over the element and hold the CTRL key to capture it.

  • If the element cannot be selected, use the Screen X and Screen Y fields to perform a coordinate-based click.

  • If multiple elements are detected, narrow the selection by enabling distinguishing attributes such as “Name”, “Role”, or “Index in parent” in the EXPLORER tab.

  • If the application window title changes on each launch, write “*” starting from the changing part in the Main Window Name and Window Name fields to ensure the element is still detected.

In cases where the elements cannot be captured as objects, coordinate selection can be made. In order to be able to operate on the coordinate, it will be sufficient for you to activate the Screen X and Screen Y lines.

Note 1: If the coordinate information changes, the operation will not take place.

Note 2: While using the activity, the screen must remain on and not locked. Otherwise, the robot receives an error.

Notes

  • Note 1: If screen resolution, window size, or window position changes, the coordinates will also change. If coordinate values vary, the action will fail. Therefore, this method is recommended only when the screen layout is fixed.

  • Note 2: The screen must remain open and unlocked while the activity is running; otherwise, the robot will encounter an error.

Global Mouse Double Click

The Global Mouse Double Click activity allows you to perform a double-click action on a specific element. It is commonly used in scenarios such as opening a file, accessing a folder, opening table records, or triggering a special action within an application. Selecting the correct element is critical; incorrect selections made with the CTRL key will invalidate the action. When coordinates are used, differences in screen resolution can cause the double-click to fail. Additionally, the robot cannot perform the action if the screen is locked or not visible. For reliable execution, the screen must be open, the element must be accurately selected, and the resolution must remain stable.

Usage Steps

  • Add the activity to the workflow.

  • Click the Pick button to select the element where the double-click will be performed.

  • Hover over the element and press the CTRL key to capture it.

  • The double-click action will be executed on the selected element.

  • If multiple elements are detected, narrow down the selection by enabling distinctive attributes in the EXPLORER tab such as “Name”, “Role”, or “Index in parent”.

  • If the application title changes each time it opens, place “*” after the constant part of the title in the Main Window Name and Window Name fields. This ensures the element can still be detected even if the window title changes.

In cases where the elements cannot be captured as objects, coordinate selection can be made. In order to be able to operate on the coordinate, it will be sufficient for you to activate the Screen X and Screen Y lines.

Note 1: If the coordinate information changes, the operation will not take place

Note 2: While using the activity, the screen must remain on and not locked. Otherwise, the robot receives an error.

Global Mouse Middle Click

Global Mouse Middle Click activity allows you to perform a middle-click action (mouse wheel click) on a specific element. It is commonly used in browser-based tasks such as closing tabs, opening items in a new tab, or triggering special context menus. If the element is not correctly selected with the CTRL key, the action will fail. When working with coordinates, resolution differences may cause the click to be applied to the wrong location. If the robot cannot see the screen (locked, minimized, or turned off), the action cannot be executed. Before triggering the click, ensure that the element is visible and accessible; if necessary, use Scroll or Bring to Front activities.

In case the application title changes at every startup, it is sufficient to write “*” from the point where the value in the Main Window Name and Window Name lines has changed. In this way, the element will be captured even if the title changes.

In cases where the elements cannot be captured as objects, coordinate selection can be made. In order to be able to operate on the coordinate, it will be sufficient for you to activate the Screen X and Screen Y lines.

Not 1: If the coordinate information changes, the operation will not take place.

Not 2: While using the activity, the screen must remain on and not locked. Otherwise, the robot receives an error.

Global Mouse Right Click

Using the Global Mouse Right Click activity, you can right click on the selected object.

In case the application title changes at every startup, it is sufficient to write “*” from the point where the value in the Main Window Name and Window Name lines has changed. In this way, the element will be captured even if the title changes.

In cases where the elements cannot be captured as objects, coordinate selection can be made. In order to be able to operate on the coordinate, it will be sufficient for you to activate the Screen X and Screen Y lines.

Note 1: If the coordinate information changes, the operation will not take place.

Note 2: While using the activity, the screen must remain on and not locked. Otherwise, the robot receives an error.

Global Record

Using the Global Record activity, you can record all the operations you have done using the keyboard and mouse with the macro recorder method and use them in the scenario. After the “Open Record” page in the “Record” line of the activity is opened, you can start the recording with the “Start Record” button and record all the operations you have done with the mouse and keyboard as a script.

During recording, you can stop the recording by using the Ctrl+Q shortcut and complete the recording with the “OK” button. If you want to stop the activity that you run with the “Run” button in the Studio application, you can use the shortcut Ctrl+Shift+Q.

Note: While using the activity, the screen must remain on and not locked. Otherwise, the robot receives an error.

Java Element Exist

Using the Java Element Exist activity, you can check for elements in java based applications. By clicking the Pick button from the Java Element Picker table, you can select and process java objects as well as windows objects.

Java Element Property Get

Using the Java Element Property Get activity, you can take the property of the selected object and transfer it to a variable. In the example below, it is seen that the value the Property Name line of which is Text is transferred to the variable.

Java Key Press

The Java Key Press activity enables the use of keyboard shortcut keys on the selected object. Using this activity, you can type text, use any java-based application or on-screen keyboard commands. In the Text line of the Java Key Press activity, you can type %{S} for the Alt+S command and ^(c) for the CRTL+C command and perform an operation.

Explorer

In the Java Element Picker table, you can navigate through the objects by clicking the Explorer button instead of Pick and select the object you want to process.

If it will be used for web applications, the Java Web Start feature must be active.

Explorer gives you access to all currently open Java objects. If an application is opened after the explorer is opened and you want to capture it, just click the REFRESH button. When you click on an object in the object tree with the CTRL button, you will have selected the object you clicked. Right after that, you can add the selected object into the activity by clicking the PICK SELECTED ELEMENT button.

Java Mouse Click

Using the Java Mouse Click activity, you can click on the selected object in java-based applications.

Java Mouse Double Click

Using the Java Mouse Double Click activity, you can double click the selected object in java based applications.

Java Mouse Middle Click

Using the Java Mouse Middle Click activity, you can click the selected object with the mouse wheel.

Java Mouse Right Click

The Java Mouse Right Click activity is used to perform a right-click action on a selected object within Java-based applications. This activity is typically preferred for scenarios such as opening context menus, initiating edit/delete actions in lists, or calling object-specific settings screens within graphical interfaces. The target element must be correctly selected, and the application must support right-click interactions. The screen must be in the foreground and the element must be visible; otherwise, the action will fail. In coordinate-based right-clicks, resolution changes may affect accuracy. If Java elements cannot be detected, the Java Bridge feature should be checked. Adding a short delay before the right-click increases execution reliability.

Usage Steps

  • Click the “Pick Java Element” button. This opens the Java Element Picker window used to identify objects within the Java application.

  • In the Element Picker window, click the PICK button at the top. Move the mouse cursor over the target element in the Java application. For example, when hovering over the “About…” button, a red frame will appear around it.

  • Press the CTRL key to complete the selection. Then click the Test button to verify whether the element was captured correctly.

  • If the system detects only one element and the frame color changes from red to yellow, click OK, and then click OK again to confirm the action.

  • If multiple elements are detected or the element cannot be captured correctly, select the appropriate Value row from the Element Picker table. Click Test again to validate the element.

Notes

  • Depending on the scenario, the following fields may be used:

    • Screen X / Screen Y: for coordinate-based selection

    • Name: for selecting based on application name

Kill Process

The Kill Process activity is used to completely terminate an application or process running in the background. This activity is the automated equivalent of manually ending a task from the Task Manager.

Notes

  • The process name must be taken from Task Manager > Details.

  • The executable name should be entered without its extension.

  • If multiple processes with the same name are running, all of them will be terminated.

PY Script Run

The PY Script Run activity is used to execute a Python script file or directly written Python code. This activity is highly effective in RPA scenarios for tasks that go beyond web automation, such as data processing, file management, and API integration. During use, only one of the fields—Script Text or File Name—should be filled; using both will cause an error. The Python environment must be installed and properly configured on the system; if environment variables are missing, the script may fail to run. If the script is executed from a file, the Working Directory field must be specified; otherwise, the file path may not be found. For cases involving large data processing or fetching data over the network, a waiting time can be defined using Delay Time. The results returned from the code can be retrieved through the Output field.

Parameters

  • Working Directory: The folder path where the Python file to be executed is located. Example: C:\Users\GLB900*****\Scripts\

  • File Name: The name or path of the Python file to be executed. Example: veri_isleme.py

  • Script Text: The Python code to be written directly. Required if File Name is not used.

Switch To Window

The Switch To Window activity is used to bring a background application window to the foreground (make it active). This activity is typically applied to focus the window before performing operations in applications that require user interaction.

Parameters

  • Window Name: The name of the window to bring to the foreground. This name must match the process name shown in Task Manager > Details. It should be written without extension (e.g., EXCEL, notepad, chrome).

Notes

  • Brings the background window to the user’s screen

  • If multiple instances of the same application exist, usually the first matching window is activated

  • If the application is minimized, it will be restored and made active

Take Screen Image

This activity captures an image of a specific area of the screen and saves it in image format to the desired folder. The coordinates can be manually defined to specify which region will be captured.

Usage Scenarios

  • When a specific screen area (e.g., warning box, form field) needs to be recorded

  • When only the relevant area is required for visual verification

  • When a particular output generated during the process (only the relevant section) must be archived as a screenshot

  • When UI elements change position and dynamic screen controls must be integrated

Parameters

  • Save Image Path: The exact folder and file name where the image will be saved. Example: “C:\New Folder\test.jpeg”

  • Save Image Path Choose: The folder where the screenshot will be saved, selectable by the user. Example: “C:\Screens”

  • Save Image Name: The name of the image to be saved. Example: “ekran_alani1”

  • Coordinates: Defines the region of the screen to capture. Format: (X, Y, Width, Height). Example: (618, 303, 776, 124)

  • Delay Time: The waiting time (in milliseconds) before the activity starts. Example: 1000

Notes

  • If the coordinates are incorrect, the captured image may include the wrong or an empty area.

  • The robot must be able to see the screen (it must not be locked or turned off).

  • The file extension must be valid; otherwise, the image cannot be saved.

  • Be aware of the risk of overwriting an existing file with the same name.

Take ScreenShot

This activity captures the current full screen and saves it as an image file in the specified folder, with the specified name and format. It is used for automated screenshot capturing operations.

Usage Scenarios

  • Capturing and saving the screen at the moment an error occurs

  • Producing visual evidence at specific steps of a process (e.g., after a success message)

  • Generating output for process tracking and manual verification

  • Saving visual documents for reporting purposes

Parameters

  • File Save Path: The full file path and name, including the extension. Example: “C:\New Folder\test.jpeg”

  • File Save Path Choose: The folder where the file will be saved, selectable by the user. Example: “C:\ScreenShots”

  • File Name: The name of the file to be saved. Example: “ekrangoruntusu1”

  • Delay Time: The waiting time before the activity starts (in milliseconds). Example: 1000

Notes

  • If the file path and name are specified together, the File Name parameter is not mandatory.

  • The extension must be in supported formats such as .jpeg, .png, or .bmp.

  • If an invalid folder path is provided, the file cannot be saved and an error may occur.

  • Be cautious about overwriting an existing file with the same name.

VB Script Run

The VB Script Run activity is used to execute Visual Basic Script (VBS) within a scenario. With this activity, you can define small automation tasks on the system, display message boxes, perform file operations, or trigger other applications. The script can either be written directly in the activity or run from an external .vbs file. In other words, you can either embed the script as text in your scenario or call a script stored in a file.

Parameters

  • Working Directory: The folder path where the script will be executed. File operations will be performed in this directory. (Optional)

  • File Name: The name of the .vbs file to be executed. Must be specified if an external file is used.

  • Script Text: The field where the VBS commands to be executed are written directly. Example: msgbox(“Merhaba Dunya”)

  • Delay Time: The waiting time before the script is executed (in milliseconds). Optional.

Notes

  • Either Script Text or File Name must be filled.

  • If File Name is used, the .vbs file must have execution permission.

  • The written code must comply with the VBS syntax that works in the Windows environment.

  • Using Delay Time is recommended, especially before system-level commands.

  • If the script throws an error, the automation may stop as well, so it should be tested step-by-step.

Do you want to have Digital Employees?